-
Hello!
Either you have not registered on this site yet, or you are registered but have not logged in. In either case, you will not be able to use the full functionality of this site until you have registered, and then logged in after your registration has been approved.
Registration is FREE, so please register so you can participate instead of remaining a lurker....
Please be certain that the location field is correctly filled out when you register. All registrations that appear to be bogus will be rejected. Which means that if your location field does NOT match the actual location of your registration IP address, then your registration will be rejected.
Sorry about the strictness of this requirement, but it is necessary to block spammers and scammers at the door as much as possible.
You are using an out of date browser. It may not display this or other websites correctly.
You should upgrade or use an alternative browser.
You should upgrade or use an alternative browser.
DIY: Two unit display viv for $100
- Thread starter Blue Apple Herps
- Start date

Blue Apple Herps
aka Matthew, PhD
Supper Design, Really simple and still attractive.
Do you live in a warm Climate. I have a heck of a time keeping temp in my Glass Viv.
Yup, live in Dallas. Temps are mega easy to keep.
I just found this thread so I'm building one right now. I am a bit confused by this part:
The part in bold is what I want to address. Your photo doesn't look like they are 3 inches in and besides, 3 inches takes a lot of space! I'm going with 1 inch, but wanted to point that out.

Thanks for the plan btw! Can't wait to finish it.
Next take the floor pieces and drill 7 holes along one long side that are 3/8" from the edge that are 3" in from the sides
The part in bold is what I want to address. Your photo doesn't look like they are 3 inches in and besides, 3 inches takes a lot of space! I'm going with 1 inch, but wanted to point that out.
Thanks for the plan btw! Can't wait to finish it.
Blue Apple Herps
aka Matthew, PhD
Sorry for any confusion. What I mean is that on the left and right side (the shorter side) you want the holes ~3" from the edge. When you attach the wooden support along the back of the shelf, the screws go through the wood fairly deep. Then when you attach shelf to the frame, when you drill screws into the wooden support you have to make sure the screws along the shelf are far enough in so that they won't hit.
tricksterpup
I has nuttin to Say.
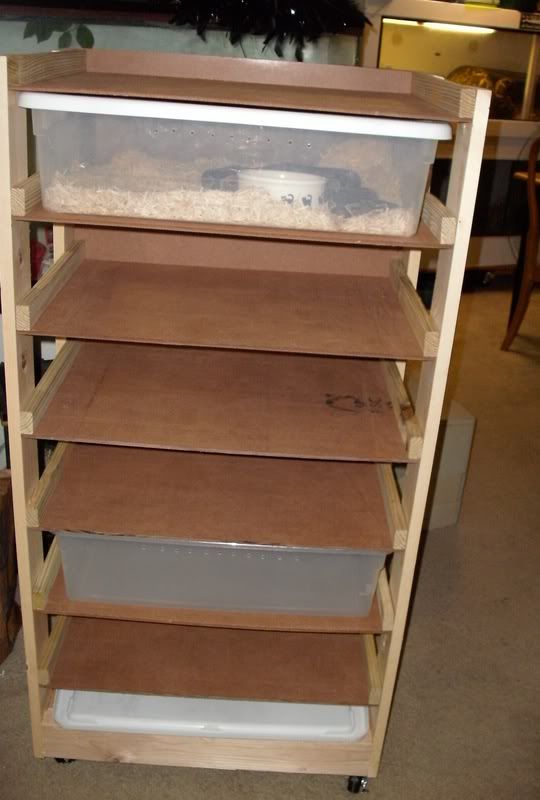
Hey Matt, I just wanted to say, I loved your instructions for the rack. I modified it a bit for the tubs but it came out great, except the top one had a bit larger gap and needs to use a lid. I replaced the Sintra for hard pressed board due to not having access to the plastic.
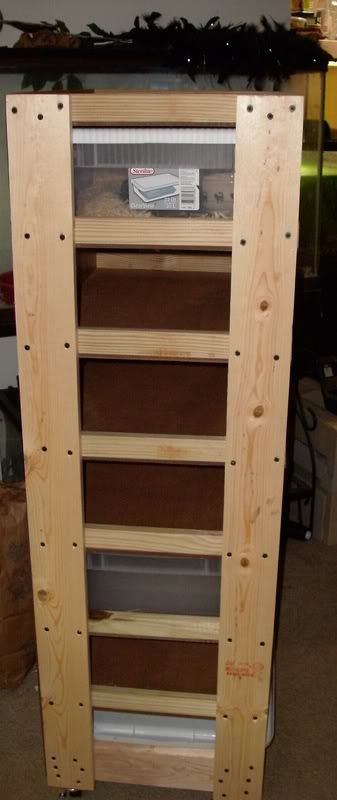
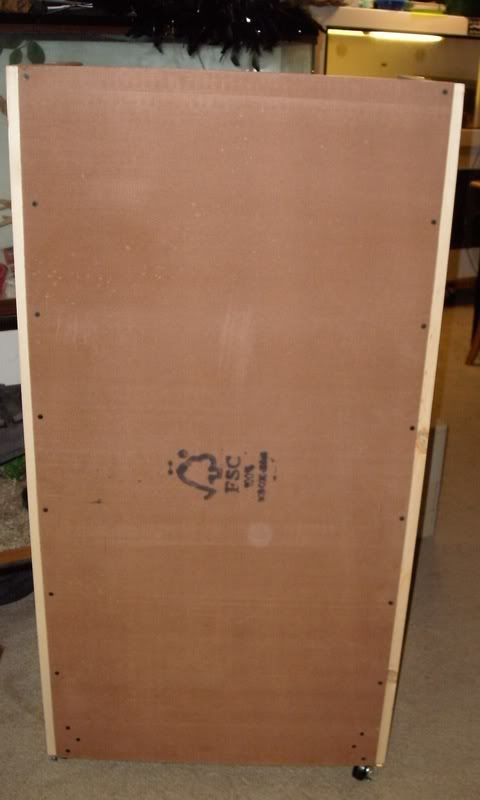
the inside look.

the inside look.
Blue Apple Herps
aka Matthew, PhD
Here is my completed cage. Still trying to decide how to heat it:

Went with the screws pointed out because your pictures were a little confusing.
Looks GREAT!! I went with flexwatt under a piece of plexiglass and sealed with silicone. Working great so far.
Also, looks like you have bare wood? I would definitely seal it up or cover it in contac paper, or it won't last long (though maybe it is and the pic is playing tricks on me)
Blue Apple Herps
aka Matthew, PhD
Hey Matt, I just wanted to say, I loved your instructions for the rack. I modified it a bit for the tubs but it came out great, except the top one had a bit larger gap and needs to use a lid. I replaced the Sintra for hard pressed board due to not having access to the plastic.
Awesome! How is the hardboard holding up? I would have thought it might sag a little, but maybe not. It would be a great alternative! Sintra has gotten very expensive for some reason, for $50 more I can but an AP economy rack and save myself a weekend of work.
But if the hardboard holds up, would make making non-melamine racks affordable again.
tricksterpup
I has nuttin to Say.
Awesome! How is the hardboard holding up? I would have thought it might sag a little, but maybe not. It would be a great alternative! Sintra has gotten very expensive for some reason, for $50 more I can but an AP economy rack and save myself a weekend of work.
But if the hardboard holds up, would make making non-melamine racks affordable again.
There is some bowing in the rack but its not bad. I think its holding up pretty good, The bowing is coming from being to tight and comes from my craftsmanship. Its my first one. But in all actuality it took 4 hours to make with right tools. All i had to do was cut the hard board in half and I only had to buy5 hard boards, and I had one half left over but will be used on the next rack. Basically it cost me about $70 for all of the wood. The most expensive part were the wheels.
I could have made this deeper and place the tubs in long wise but I went with the width instead of depth. This way I can use it for either 1 32 qt long tub or 1 smaller 15 qt tubs.
You gave a pretty good design and I recommend others to use it. Its light enough for one person to move around and carry. My SO carried it up a flight of stairs by herself while i was out of the house. I am not sure how its going to hold up in the next 10 years or how long its going to last but right now its been doing pretty good for the first month.
But for those who want to build a rack, this a way to go. Its very similar to a AP rack, after all I own one. I like them and will again order another one from them. But for now, I am going the Cheaper route and building my own. My next attempt will be a 10 shelf rack system.
Looks GREAT!! I went with flexwatt under a piece of plexiglass and sealed with silicone. Working great so far.
Also, looks like you have bare wood? I would definitely seal it up or cover it in contac paper, or it won't last long (though maybe it is and the pic is playing tricks on me)
I was wondering if I put one of those under tank heaters under some plexiglass if that would be ok. So, sounds like the way to go!
Yeah, bare wood. Why wouldn't it last long?
Blue Apple Herps
aka Matthew, PhD
I was wondering if I put one of those under tank heaters under some plexiglass if that would be ok. So, sounds like the way to go!
I think that would work as well. Might want to get some more opinions though. I think they need airflow to work properly, but maybe not.
Yeah, bare wood. Why wouldn't it last long?
Urates, poop, spilled water, etc will eventually take their toll.
Hey Matthew! (And anyone else with suggestions..) I'm thinking of making one of these in a single unit, but quite a bit bigger that will be for Grendel to live in when he grows up. I'll be making it 30"H x 72"W x 30"D. I'm trying to think out what things that were done here will need to be adapted for an Eastern Indigo..
Here's what I've thought of so far, please add anything that might occur to you that I haven't thought of.
1. The plexiglass may have to be a bit thicker? I have noticed that as the pieces get bigger, they become more flexible. I have noticed with the one double unit I built for the corns that they can push (flex) out the corners with their noses if the screen hardware isn't close enough to the edge. There's also the idea of framing the plexi with wood, but that will change so many other measurements and might fatally complicate the project at my skill level, lol.
2. The screen hardware itself, do you think it will be strong enough for an Indigo or should I look at another type of closure?
3. The thin nail gun nails and peg board.. I am concerned that with constant pushing, he could probably push the back right off. I'm thinking making the back out of the melamine board, and either installing vents or drilling holes into it to make it look like peg board.
4. And finally with the bigger and wetter messes that come with Indigos, I'm not comfortable heating with an exposed piece of flex watt. Not just for risk that it would get wet, but even with the double unit corn snake enclosure I built, cleaning the flex watt is the most time consuming part of the setup.. I'd like to think of a way to set it in to the melamine, cover it and seal it. Or maybe I'll need to look at other heating options? Maybe heat cable would be easier to set into grooves and cover..
Anyway, any suggestions would be appreciated!
Blue Apple Herps
aka Matthew, PhD
That's quite big!! You would want some sort of support in the middle of the front to support the weight of the top piece, or else you'll have sagging. So doing that, I would then recommend having two doors. Making the back out of melamine would be fine.
As for heating, you might want to look at radiant heat panels.
As for heating, you might want to look at radiant heat panels.
That's quite big!! You would want some sort of support in the middle of the front to support the weight of the top piece, or else you'll have sagging. So doing that, I would then recommend having two doors. Making the back out of melamine would be fine.
As for heating, you might want to look at radiant heat panels.
Great points, thanks, I hadn't thought about sagging, but that makes sense.. I think the double doors are a great idea too, that's going to let me use the regular thickness of plexiglass as well I would imagine.
Good thing I asked before I started! I think I'll go ahead and make it, I've got quite a bit of time before he's big enough to use it, I'll figure out heating later.
Blue Apple Herps
aka Matthew, PhD
Urates, poop, spilled water, etc will eventually take their toll.
Hi Matthew,
Great design ! I will build one myself.
If using bare wood a thick layer of laquer would do the trick. What do you think ? Or perhaps some water resistant paint ?
Cheers /Olaf[/QUOTE]
It would probably be OK. The biggest thing is you'd want to make sure that it is fully cured, and that once fully cured there's nothing toxic to the snake. When I used to make bare wood display vivs, I'd just a water based sealant with good success.
You could also cover the entire thing with Contac Paper. I've done this and it worked well, too. Just make sure you cover it before you assemble it so you can have the paper go past the edge just a big so you don't risk it peeling up.
mtolypetsupply
New member
There is some bowing in the rack but its not bad. I think its holding up pretty good, The bowing is coming from being to tight and comes from my craftsmanship. Its my first one. But in all actuality it took 4 hours to make with right tools. All i had to do was cut the hard board in half and I only had to buy5 hard boards, and I had one half left over but will be used on the next rack. Basically it cost me about $70 for all of the wood. The most expensive part were the wheels.
I could have made this deeper and place the tubs in long wise but I went with the width instead of depth. This way I can use it for either 1 32 qt long tub or 1 smaller 15 qt tubs.
You gave a pretty good design and I recommend others to use it. Its light enough for one person to move around and carry. My SO carried it up a flight of stairs by herself while i was out of the house. I am not sure how its going to hold up in the next 10 years or how long its going to last but right now its been doing pretty good for the first month.
But for those who want to build a rack, this a way to go. Its very similar to a AP rack, after all I own one. I like them and will again order another one from them. But for now, I am going the Cheaper route and building my own. My next attempt will be a 10 shelf rack system.
The rack looks great! Sorry to hear about the bowing, but here's something that might help with both the bowing and longevity. Flip the rack over. Reason being, from how it looks in the pics, the hardboard is mounted to the underside of the supports. Therefore, only the fasteners are holding it there, and the whole shelf is being held up by only the heads of the screws or nails, not much surface area for support. With the hardboard on top of the wood rail supports, you now have your whole rail length and width supporting the hardboard. If need be, you can put a cross member between the two rails for extra support.
I may not know diddly about corns yet, but I've done a little construction in my day.