theneedmachine
New member
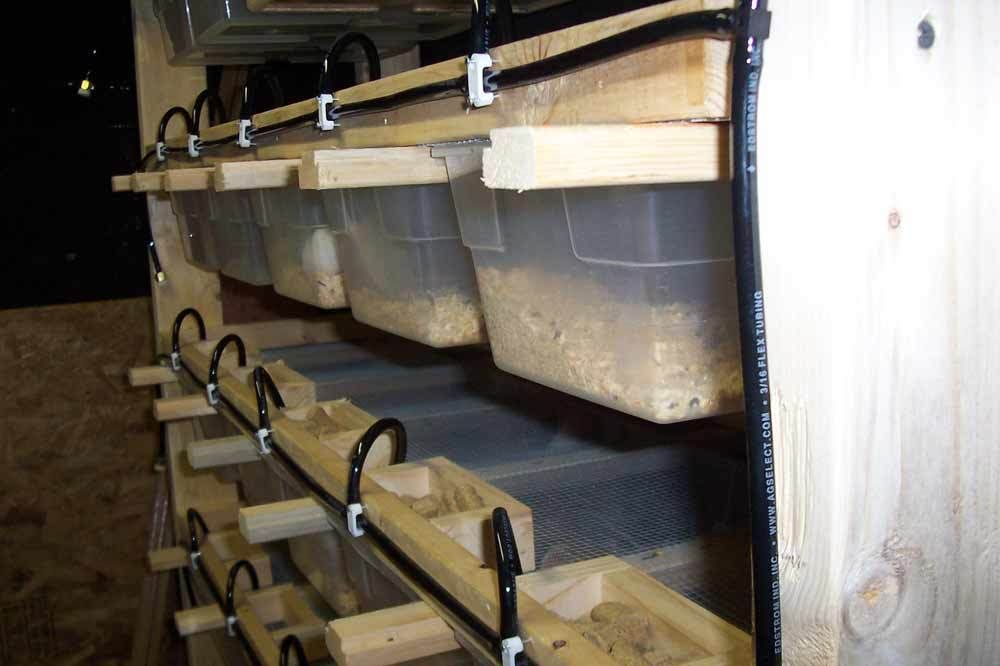
I built this rack over a year ago and did a write up on my site, just wanted to share with you guys. Its not super detailed but feel free to ask any questions Ill be happy to help!
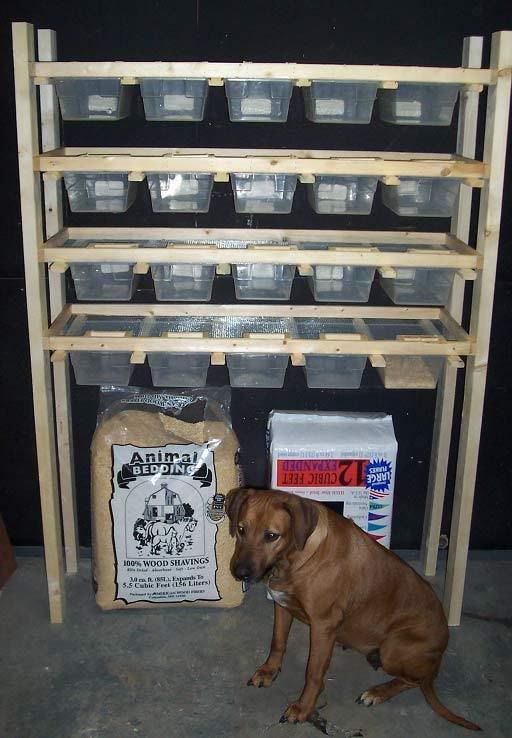
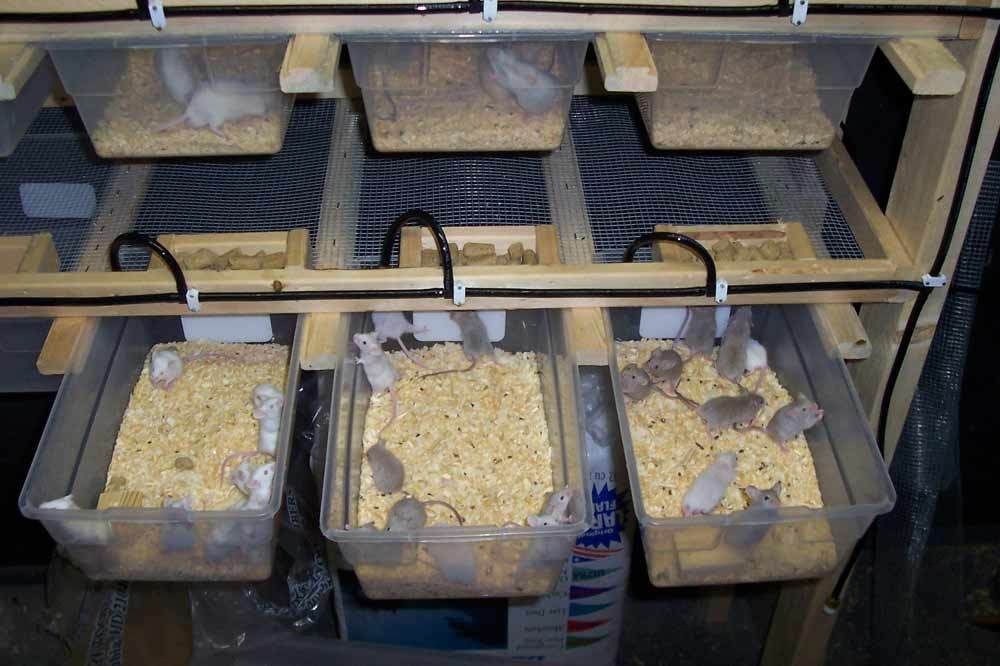
It is designed to be small and hold ratio's of 1.3 If you are a big time breeder this may not be the rack for you, however it did produce about 500 pinkies in a month for me.
To build what is pictured bellow you will need:
20. 1"x2"x8" @ 1.15ea
4. 2"x4"x8' @ 2.00ea
2. 3'x5' rolls of 1/4" hardware mesh @ 8.00ea
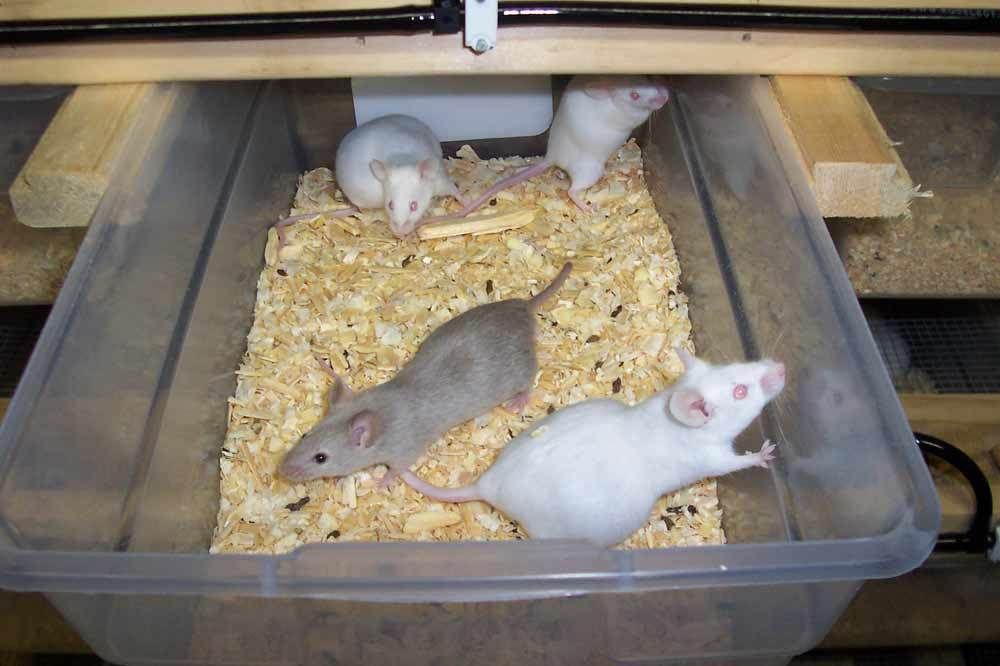
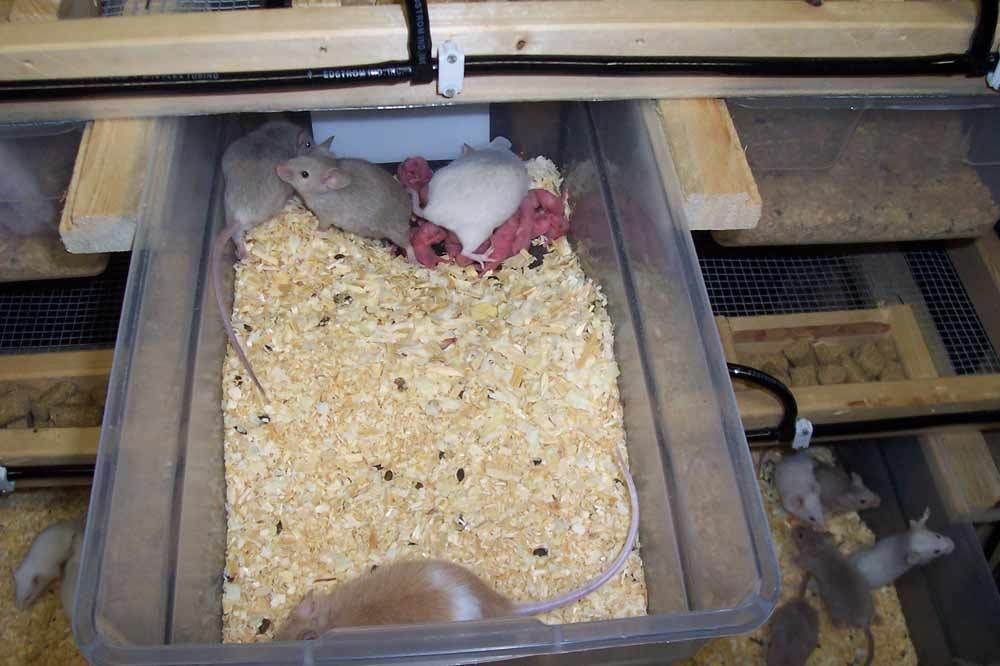
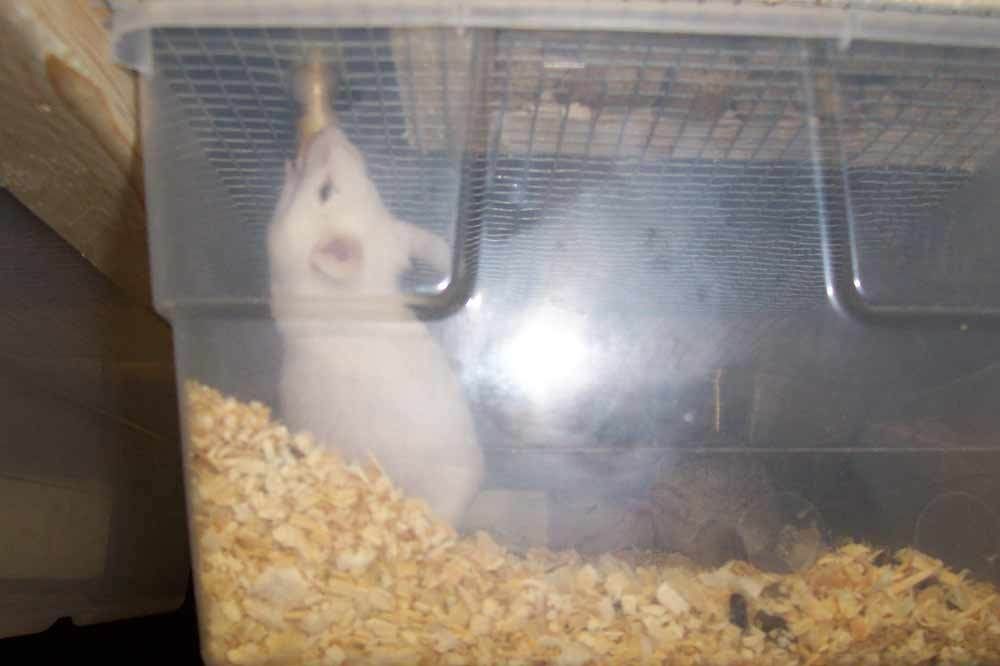
20. 6 QT. tubs @ 1.00ea I used the sterlite tubs from Big Lots they measure about 8"wide X 4"tall X 12" long
So for the first 20 tubs I have about 70.00 invested. Plus the watering system which will be about another 100.00.
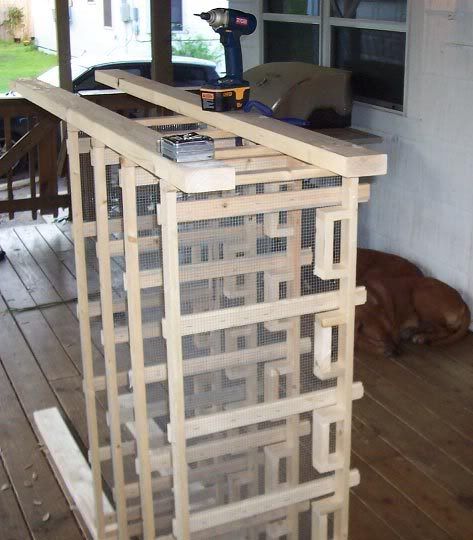
You can construct it however you see fit....I used a 16 gauge nail gun and 2" nails along with wood glue. I used a hand held staple gun and 3/8" staples to staple the mesh down. I also used 2" exterior screws to mount the frames to the legs.
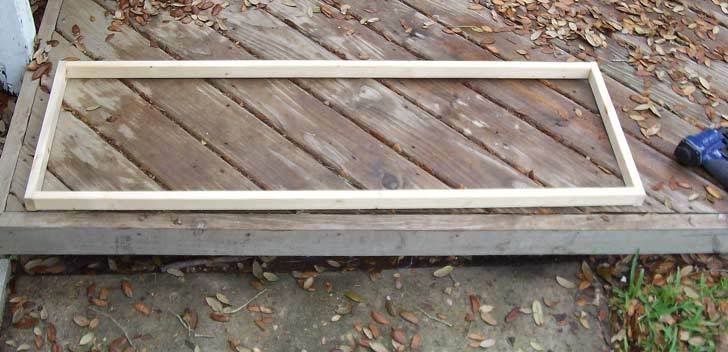
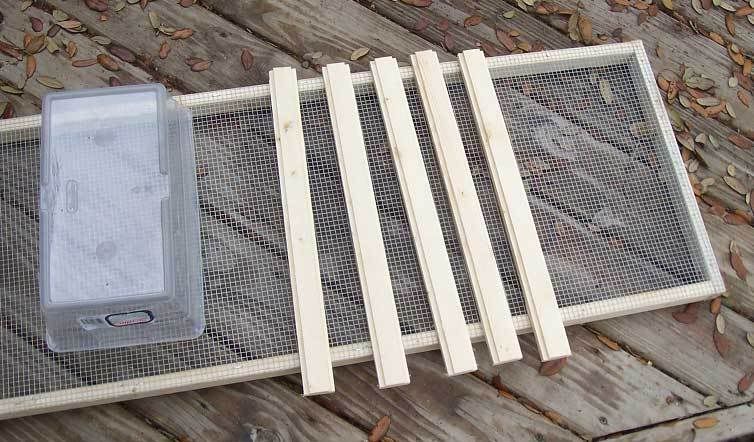
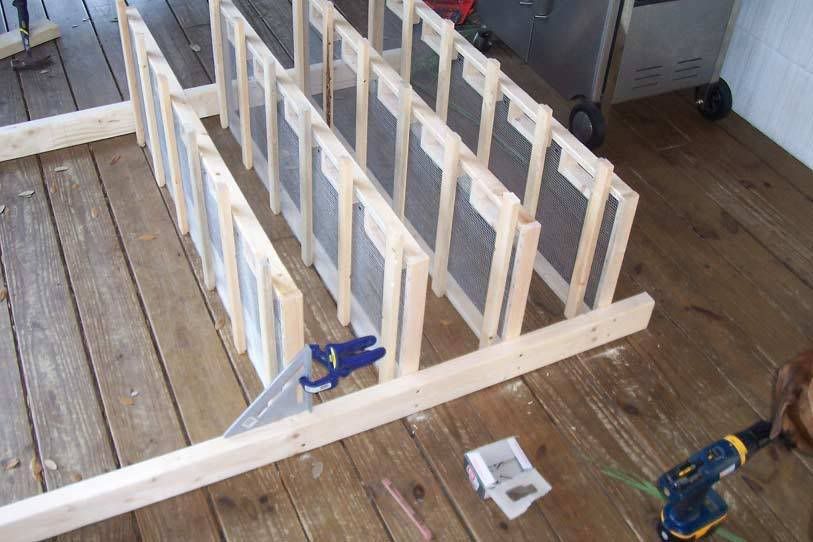
1. I cut 4 of the 1x2x8's in half, and cut 8 pieces of 1x2's down to 16". these will be used for the main frame were the tubs will hang. I nailed and screwed the 16" pieces to outside edge of the 4' pieces.
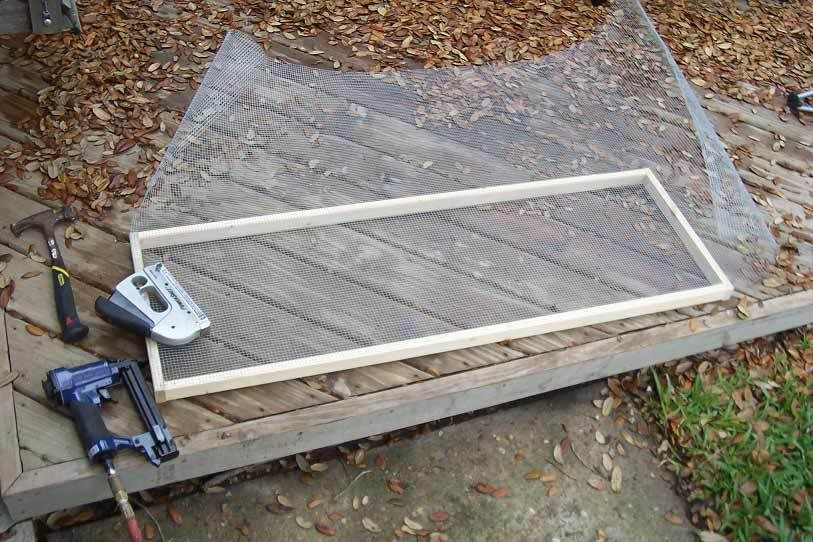
2. Next I unrolled the screen mesh over the frame and stapled it all the way around keeping it as tight as possible....helps to have another set of hands.
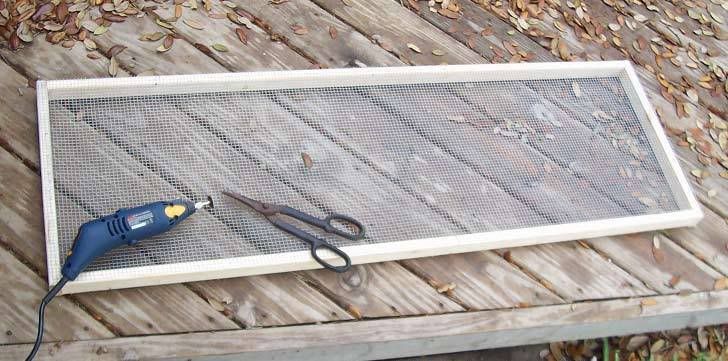
3. Next I trimmed the access mesh from the frame using a rotary tool with a cut off wheel. you can use wire cutters too. either way is fine.
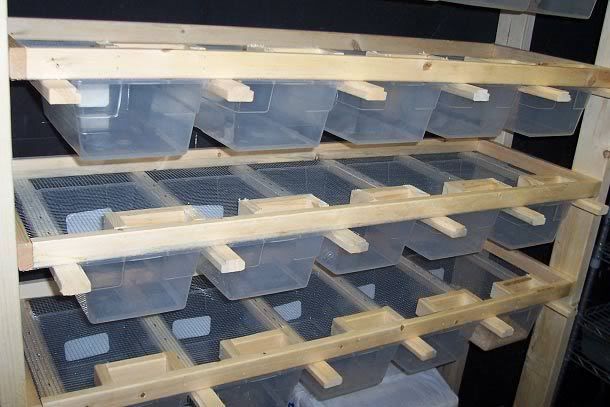
4.Now I cut 24, 18" pieces of 1x2. these are going to be used as the supports the tubs will hang and slide on. 6 will be needed for each row of 5 tubs. I will refer to them as the sliders.
5. Each 18" slider will need to have a slot on each side of it, cut out. This slot is where the tubs will hang and slide from. The tubs have a about a 3/16"x3/16" lip all the way around. So I notched the 24, 18" 1x2' sliders, 1/4"x1/4" (see pic below) I did this buy setting the fence on my table saw 1/4" from the far side of the balde and lowering the blade so that it only sticks up 1/4" from the table. each board must be ran through the table saw 4 times to get the slot right. To save time the end sliders on each row only need to be notched on one side as they will not support 2 tubs only one.

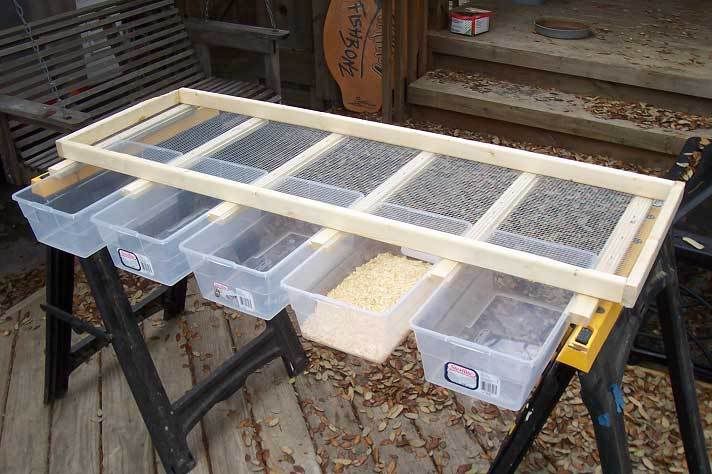
6. After each slider has been slotted it must be attached to the frame with slotted side touching the mesh. The sliders should be flush on the back side and hang 2" off the front, This allows you to slide the tubs completely foward without them sagging or falling. However to take the tubs out you must pull your water valve out. My spacing on the sliders is: 1 & 1/4" from the end and then i made a spacer that was 7 & 1/2" to properly space each slider. When attaching the sliders I suggest testing your tubs to make sure they slide easily and dont jam. if They jam then chances are you need to space your sliders slightly further apart.

7. Next i flipped over the frame and sliders and check to make sure the tubs all fit snugly and would slide without jamming.
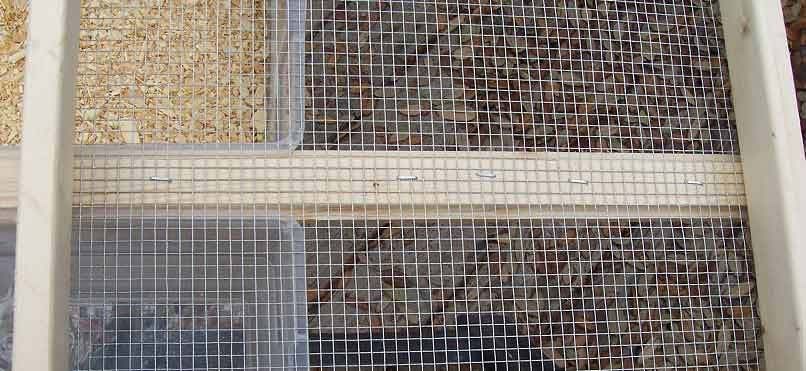
8. With the frame and slider turned over I stapled the mesh to the sliders so that there were no gaps that a mouse could squeeze its way out of.
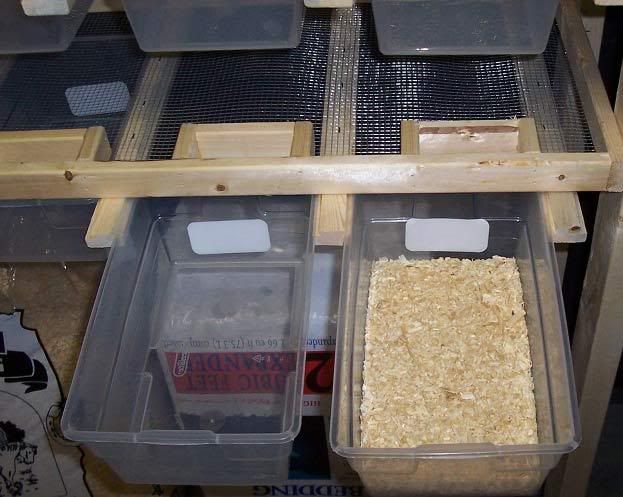
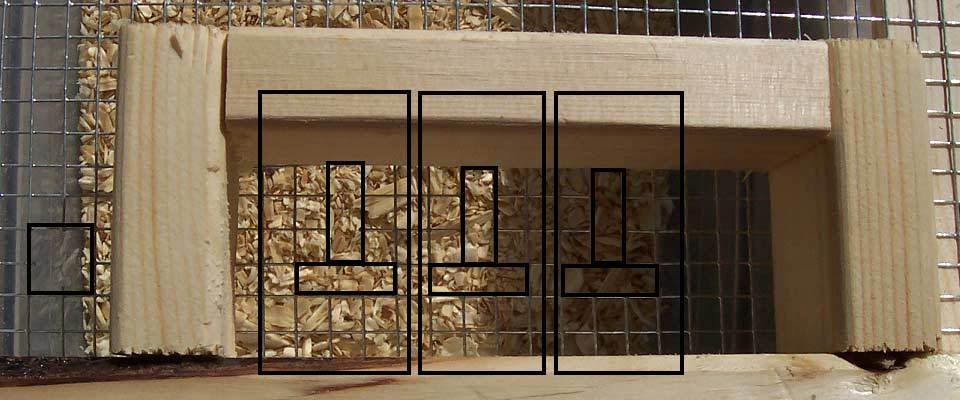
9.Next I built the food holder for each tub. very simply built U shapes out of 1x2's that measured 2 & 1/4"x 4" you can make your feeder any size you want. this size should about feed 4 mice for a week..if it doesnt ill adjust the size accordingly. I attached the feeders to the front of the frame just slightly off center so that there is plenty of room for the water tube and valve. After the feeders were attached I turned the frame back over and cut T shaped feeder holes for the mice to reach up through to grab the food. 1/4 mesh is too small for adult mice to get their mouths through easily. next to the food holder I cut out a square for the water tube and valve.
10. Next I attached each frame to the back legs of the rack. I laid the legs on the ground and measured 4" from the top and squared off a line. I then clamped the top frame to both legs and predrilled holes for the 2" screws I used to attach them. Make sure that you use a square of some type to keep each frame straight, this is very important. After the first frame is in place I measured down 11 & 1/2" and attached the next frame in the same manner and so on til all 4 frames were attached to the back legs.
It is designed to be small and hold ratio's of 1.3 If you are a big time breeder this may not be the rack for you, however it did produce about 500 pinkies in a month for me.
To build what is pictured bellow you will need:
20. 1"x2"x8" @ 1.15ea
4. 2"x4"x8' @ 2.00ea
2. 3'x5' rolls of 1/4" hardware mesh @ 8.00ea
20. 6 QT. tubs @ 1.00ea I used the sterlite tubs from Big Lots they measure about 8"wide X 4"tall X 12" long
So for the first 20 tubs I have about 70.00 invested. Plus the watering system which will be about another 100.00.
You can construct it however you see fit....I used a 16 gauge nail gun and 2" nails along with wood glue. I used a hand held staple gun and 3/8" staples to staple the mesh down. I also used 2" exterior screws to mount the frames to the legs.
1. I cut 4 of the 1x2x8's in half, and cut 8 pieces of 1x2's down to 16". these will be used for the main frame were the tubs will hang. I nailed and screwed the 16" pieces to outside edge of the 4' pieces.
2. Next I unrolled the screen mesh over the frame and stapled it all the way around keeping it as tight as possible....helps to have another set of hands.
3. Next I trimmed the access mesh from the frame using a rotary tool with a cut off wheel. you can use wire cutters too. either way is fine.
4.Now I cut 24, 18" pieces of 1x2. these are going to be used as the supports the tubs will hang and slide on. 6 will be needed for each row of 5 tubs. I will refer to them as the sliders.
5. Each 18" slider will need to have a slot on each side of it, cut out. This slot is where the tubs will hang and slide from. The tubs have a about a 3/16"x3/16" lip all the way around. So I notched the 24, 18" 1x2' sliders, 1/4"x1/4" (see pic below) I did this buy setting the fence on my table saw 1/4" from the far side of the balde and lowering the blade so that it only sticks up 1/4" from the table. each board must be ran through the table saw 4 times to get the slot right. To save time the end sliders on each row only need to be notched on one side as they will not support 2 tubs only one.
6. After each slider has been slotted it must be attached to the frame with slotted side touching the mesh. The sliders should be flush on the back side and hang 2" off the front, This allows you to slide the tubs completely foward without them sagging or falling. However to take the tubs out you must pull your water valve out. My spacing on the sliders is: 1 & 1/4" from the end and then i made a spacer that was 7 & 1/2" to properly space each slider. When attaching the sliders I suggest testing your tubs to make sure they slide easily and dont jam. if They jam then chances are you need to space your sliders slightly further apart.
7. Next i flipped over the frame and sliders and check to make sure the tubs all fit snugly and would slide without jamming.
8. With the frame and slider turned over I stapled the mesh to the sliders so that there were no gaps that a mouse could squeeze its way out of.
9.Next I built the food holder for each tub. very simply built U shapes out of 1x2's that measured 2 & 1/4"x 4" you can make your feeder any size you want. this size should about feed 4 mice for a week..if it doesnt ill adjust the size accordingly. I attached the feeders to the front of the frame just slightly off center so that there is plenty of room for the water tube and valve. After the feeders were attached I turned the frame back over and cut T shaped feeder holes for the mice to reach up through to grab the food. 1/4 mesh is too small for adult mice to get their mouths through easily. next to the food holder I cut out a square for the water tube and valve.
10. Next I attached each frame to the back legs of the rack. I laid the legs on the ground and measured 4" from the top and squared off a line. I then clamped the top frame to both legs and predrilled holes for the 2" screws I used to attach them. Make sure that you use a square of some type to keep each frame straight, this is very important. After the first frame is in place I measured down 11 & 1/2" and attached the next frame in the same manner and so on til all 4 frames were attached to the back legs.