• Hello!

    Either you have not registered on this site yet, or you are registered but have not logged in. In either case, you will not be able to use the full functionality of this site until you have registered, and then logged in after your registration has been approved.

    Registration is FREE, so please register so you can participate instead of remaining a lurker....

    Please be certain that the location field is correctly filled out when you register. All registrations that appear to be bogus will be rejected. Which means that if your location field does NOT match the actual location of your registration IP address, then your registration will be rejected.

    Sorry about the strictness of this requirement, but it is necessary to block spammers and scammers at the door as much as possible.

3rd rackbuild

diamondlil

Mice! They taste so nice!
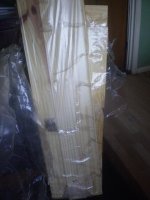
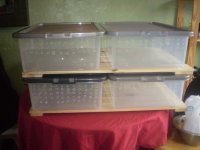
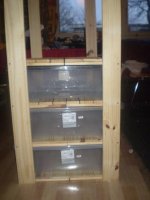
I've been busy starting an attempt at a far less ghetto rack. I had some pine shelving I didn't need anymore, and got a new set too so that I can make a 20 tub rack. The materials have been stored in my shed because I didn't feel up to starting the project.
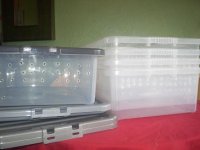
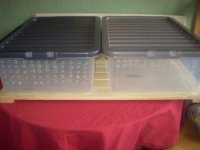
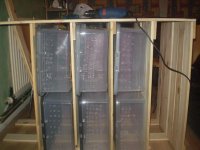
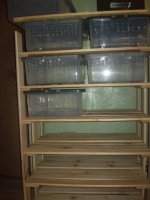
A lovely new Wilkos has opened near us, so I made the boys go and get me some new tubs. I decided to rule out tub clearance issues by building the rack around the tubs.
 

Attachments

  • 1.JPG
    1.JPG
    34.3 KB · Views: 138
  • 2.JPG
    2.JPG
    33.4 KB · Views: 139
  • 3.JPG
    3.JPG
    35.1 KB · Views: 139
  • 4.JPG
    4.JPG
    35.8 KB · Views: 139
Janine, what brand of tubs are those? The rubbermaid tubs that everyone used to use on this side of the pond we cant' get anymore. I miss them. Your's look like good ones.
 
I've made the first 6 shelves, and decided to make the top 4 seperately so I can get the rack through the door, then attach the top when the rack's in place.
I've got a longer heat cable, and am going to rope my sister in to getting sheets of pegboard for the outside from a DIY superstore.
So far, so good. The tubs fit just right, the lids are held shut by the size of the shelves, and slide in and out with just a little resistance.
 

Attachments

  • 6.JPG
    6.JPG
    34.6 KB · Views: 136
  • 8.JPG
    8.JPG
    45.4 KB · Views: 136
  • 10.JPG
    10.JPG
    43.3 KB · Views: 137
These are 32 litre tubs from a range called crystal. The tubs for my yearlings are the same length but exactly half the width, so give them plenty of stretching out room without overwhelming them.
 
Compared to my first 2 racks, this is actually going to look nice! Skeeter the kingsnake had an unscheduled wander around my bedroom despite the bulldog clips on his tub, his lid is temporarily held down with bungee cords so I thought I'd better get on with the project.
I'll put the top section together tomorrow and persuade my sister she wants to visit the DIY superstore soon.
 
Looks great! I just bought my second rack today...And got tubs on sale at Target! Now if only I could pay someone to melt the holes- I HATE that.
 
Thanks Nanci. I don't mind melting the holes so much,but my power screwdriver was playing up so I've got a blister from using a normal one!
 
Looks good janine.

I used a soldering iron to put holes in chompys feeding tub, Just wouldnt recommend doing that too much because of the fumes given off by burning plastic (And make sure u get all the plastic off the soldering iron while its still hot!)
 
Looks great! I just bought my second rack today...And got tubs on sale at Target! Now if only I could pay someone to melt the holes- I HATE that.

I know I probably sound like a broken record with this, but try a Dremil drill. I can do a tub in a couple minutes, makes a bit of a mess, but the vacume pics that up.
 
A soldering iron! Nope I use a retired screwdriver heated up on the stove! (With the windows wide open)
 
I just like how smooth the melted holes are compared to drilled ones. Janine- I'd go buy a new soldering iron rather than doing that!
 
I should do, but the screwdriver is about a foot long (Why would you ever need such a long screwdriver?) so it seems to work quite well and keeps my hands well away from the heated end!
 
Very nice setup you got going on there.

Be careful with burning plastics, it can release Dioxin which is a very nasty substance. One trick to smooth hole drilled is extend a box cutter knife to its full length and run it at a 45 angle along both sides to trim off the excess so its smooth to the touch.
 
I'm honestly thinking about starting a tub rack myself..but I am afraid that the tops of the tub could pop off..How do you guys keep the lids on nice and tight? When I was at wal-mart I saw that some clicked in..but with a little push you can still get the middle part where there were no clips to come up enough for a snake to get out..or is a snake not strong enough to lift the lid? I'm new to the whole tub rack idea...do tubs work without racks or do you need a rack to hold the lids down on the tubs? Sorry for all the questions..
 
Are you guys srsly buying this????? :nope: J9 I love ya girl, but I need proof these racks are bein' built by Yuah!! lmao And I mean I want the real deal w/ you in a halter/short overalls & a tool belt!! j/k
Love the racks! A beautiful job your doing & I too need one of you around here....:smash: lol
 
Back
Top