• Hello!

    Either you have not registered on this site yet, or you are registered but have not logged in. In either case, you will not be able to use the full functionality of this site until you have registered, and then logged in after your registration has been approved.

    Registration is FREE, so please register so you can participate instead of remaining a lurker....

    Please be certain that the location field is correctly filled out when you register. All registrations that appear to be bogus will be rejected. Which means that if your location field does NOT match the actual location of your registration IP address, then your registration will be rejected.

    Sorry about the strictness of this requirement, but it is necessary to block spammers and scammers at the door as much as possible.

Home made incubator

HazAnga

Corn's + Garters
Well... I was kinda bored at work again and with not having much work to do for the rest of the week... yesterday and today i did some large amounts of work on my incubator.
I've made this because the small one i made is more for once clutch, now that might do me for this year, but for the 2014 season and above... I'll be needing more room then that. So i made a bigger one.
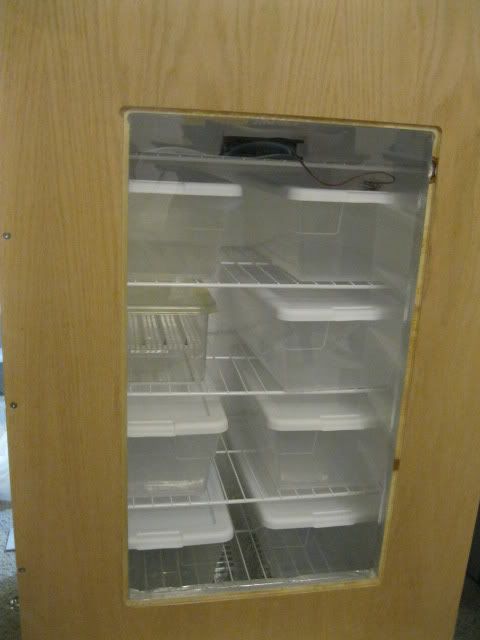
It's a sort of fridge style, in the sense that it opens up from the front and shelves like a fridge would.
(Sorry about photo quality, my cell camera isn't as good as it used to be)
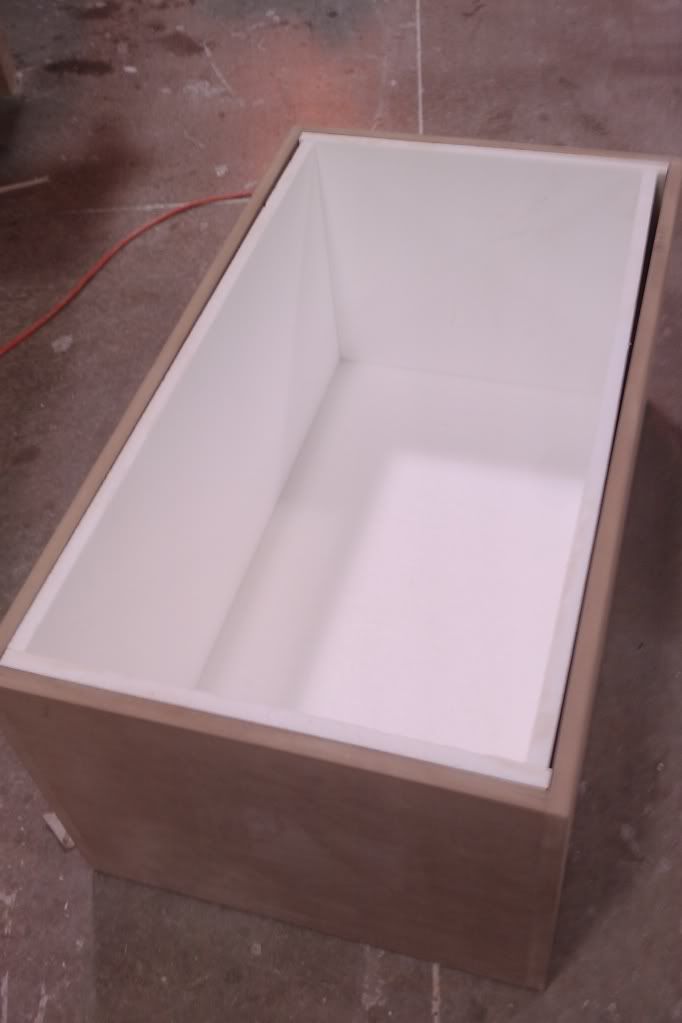
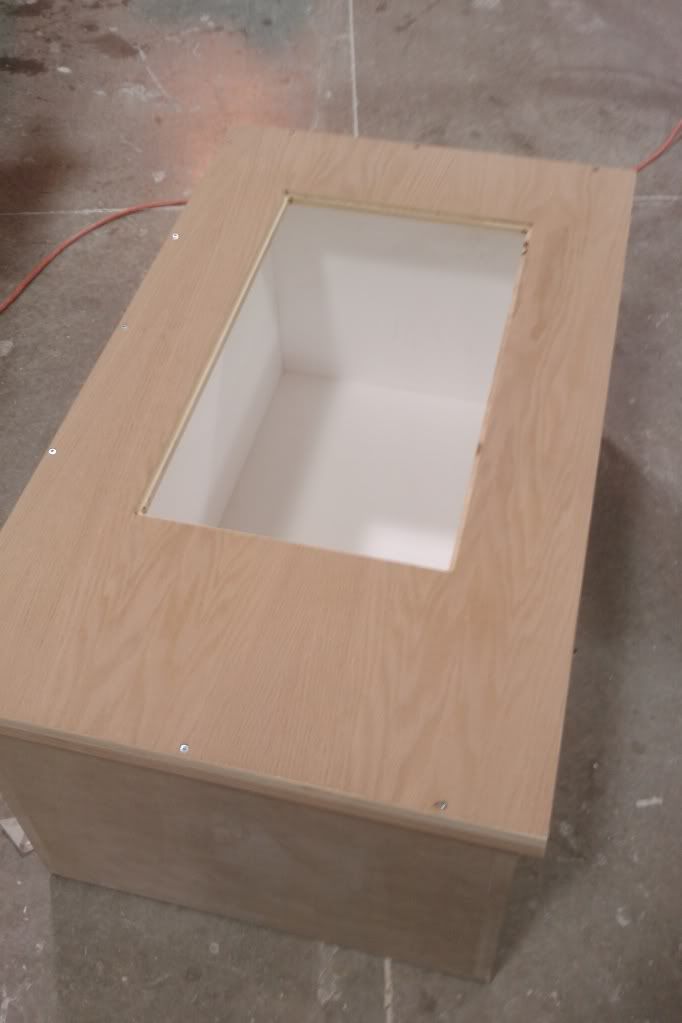
So here's the shell with the styrofoam siliconed in place.
IMAG0213.jpg

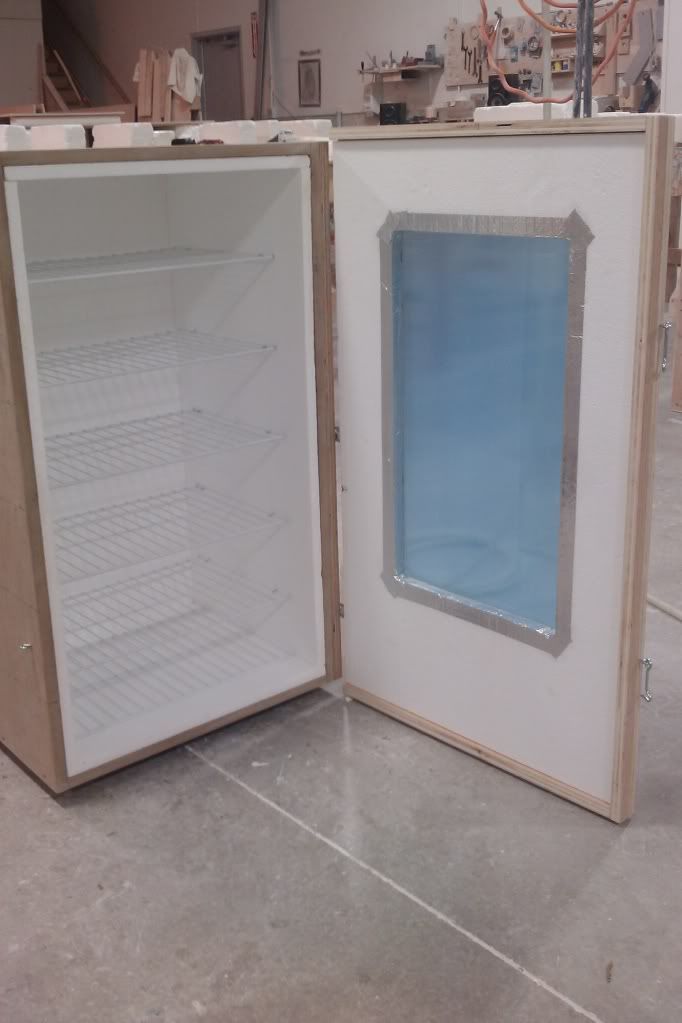
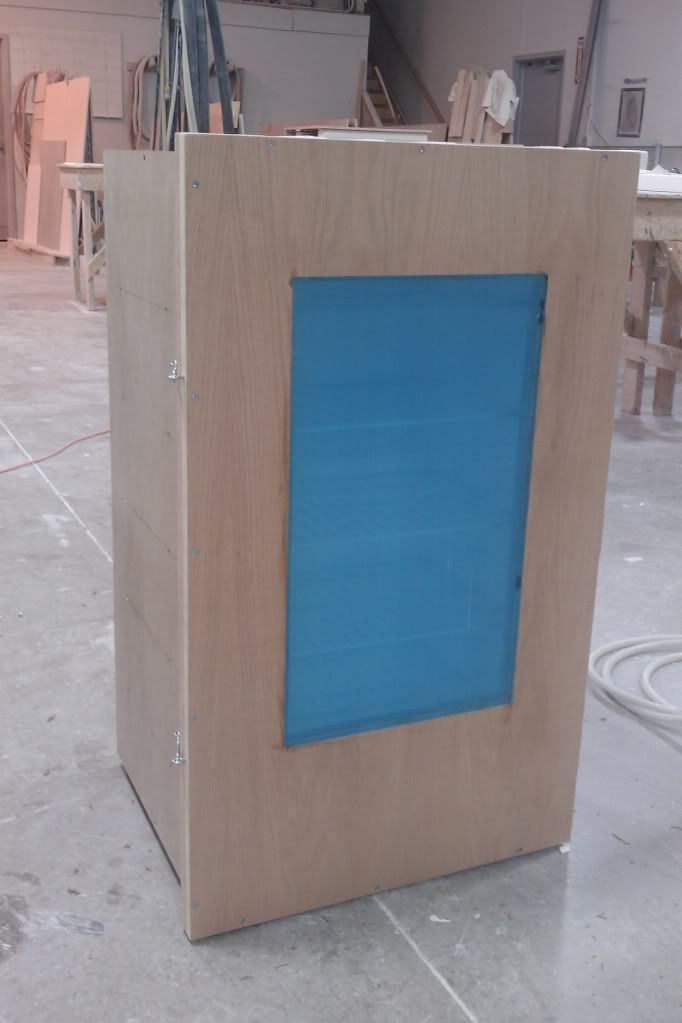
Here it is laying on it's back with the door on it, i notched out around the hole so that the piece of plexi would just sit in it without a problem. The pro's of having routers at your disposal.
IMAG0214.jpg

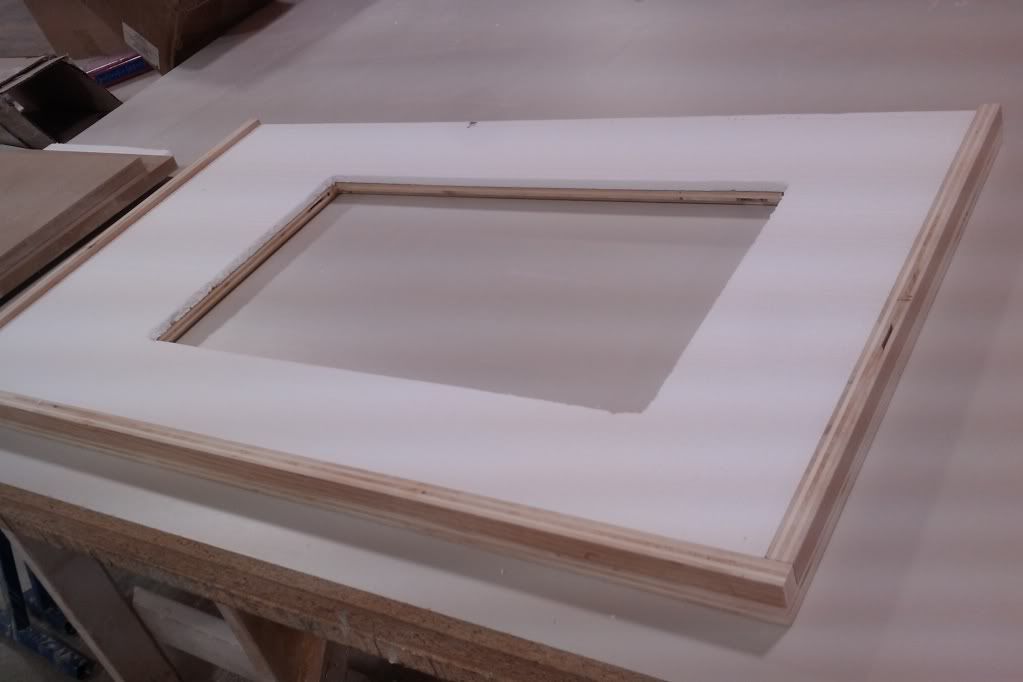
Here's the back side of the door.
IMAG0215.jpg

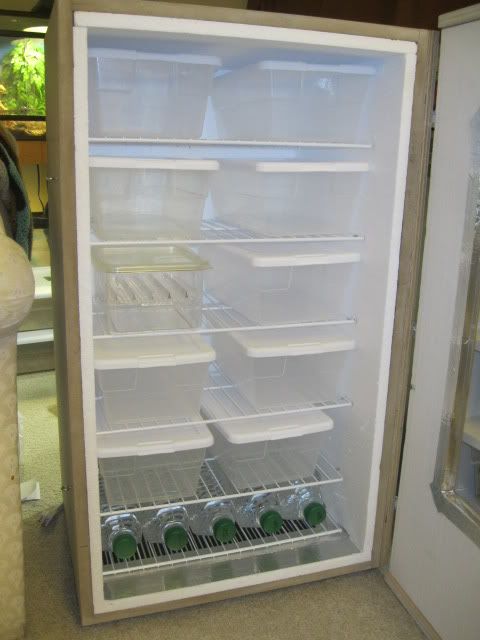
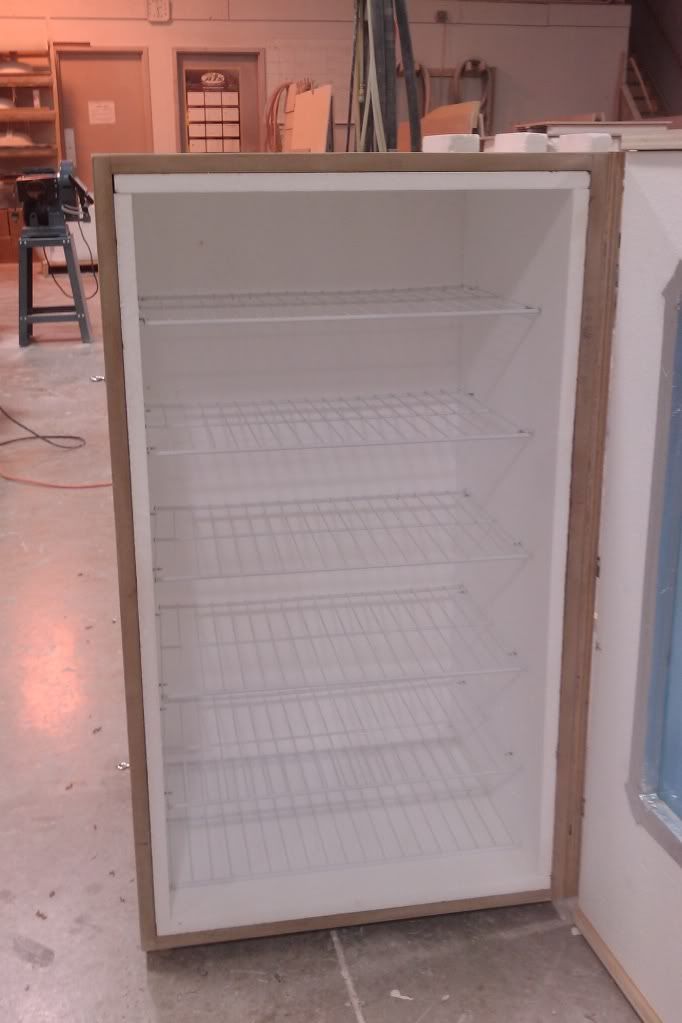
The inside of it, almost complete. I used wire closed shelving and a grinder to cut it to size and the extra part I didn't need and made it into a flat (well it bent from heat of grinding so some persuading was needed to make them flatter) wire shelf. I then measured and put screws in the side to hold the shelves up.
IMAG0216.jpg

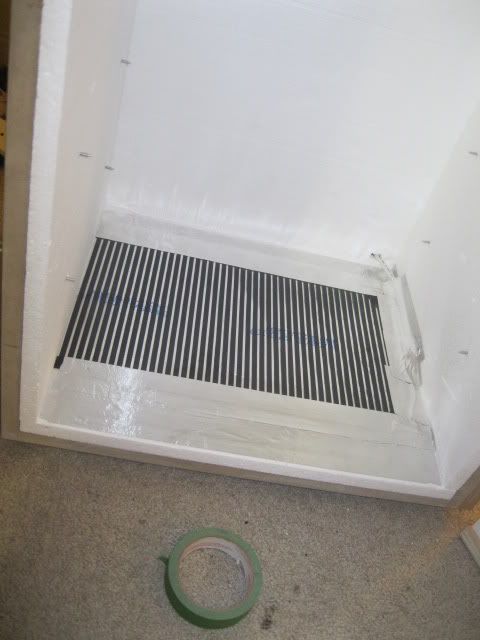
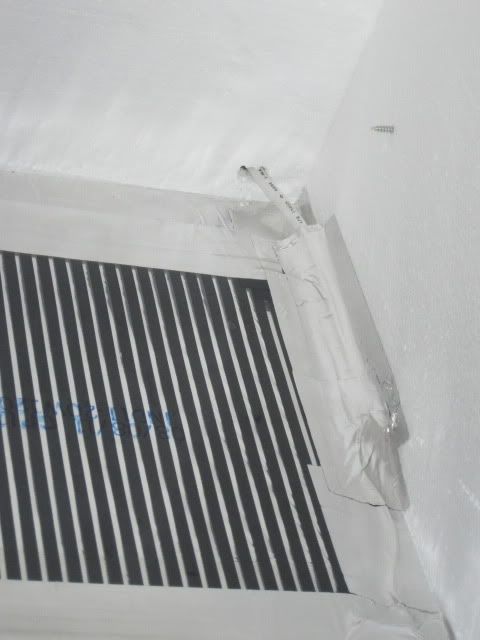
as you can see here I put some foil tape by the window to cover up the edge of the foam and have less possibility of heat escape.
IMAG0217.jpg

Door closed
IMAG0218.jpg

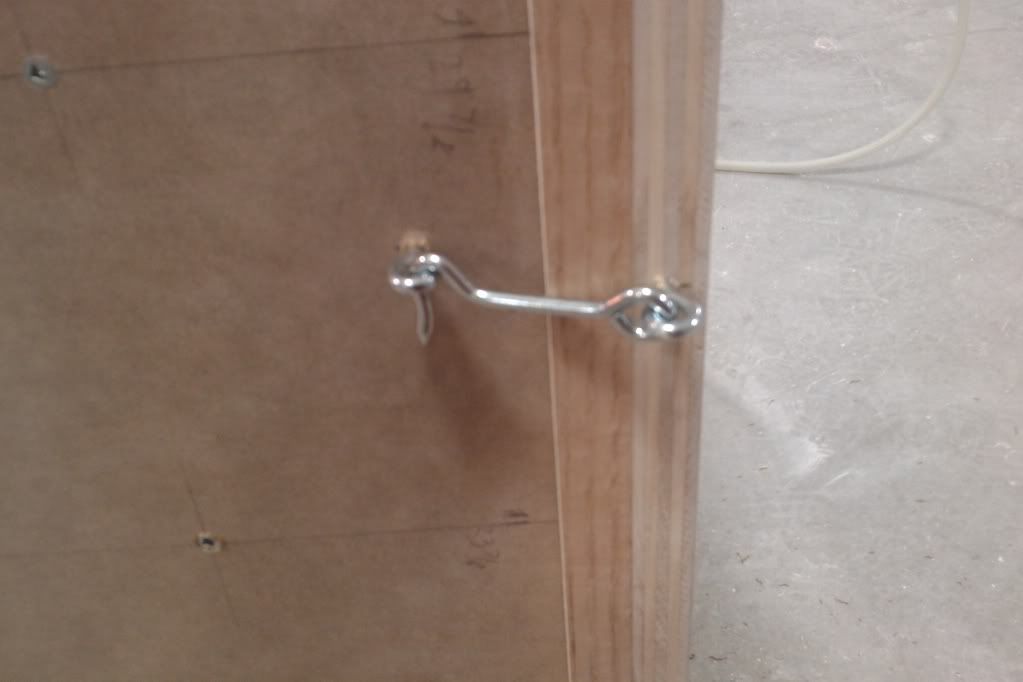
I used these hooks to keep the door shut and shut tighter, there's 2.
IMAG0219.jpg

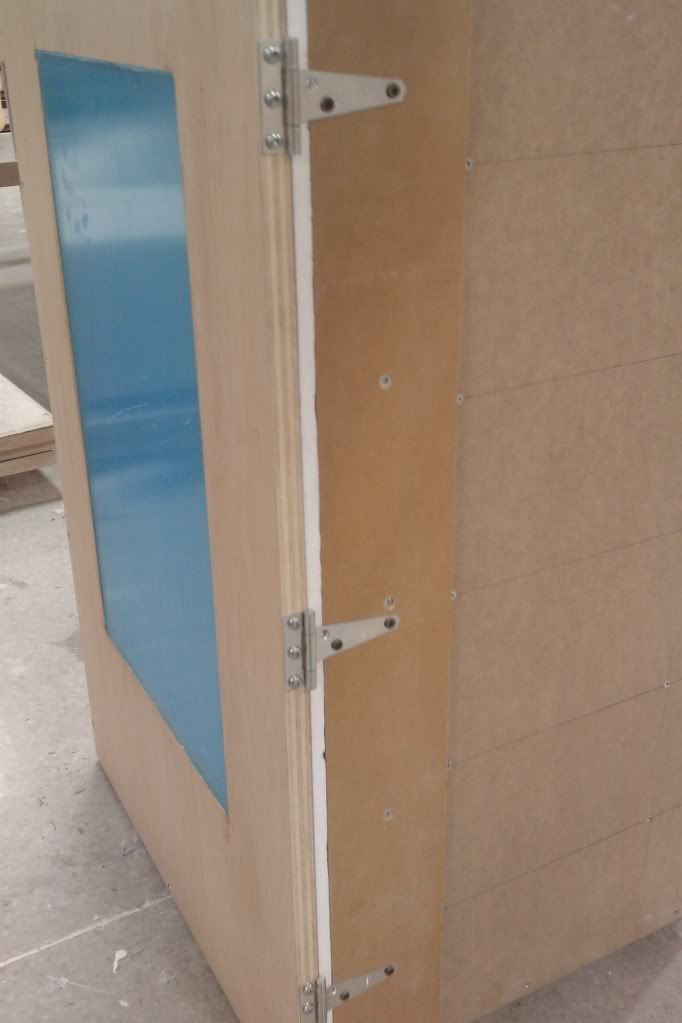
And I put 3 hinges on the opposite side... so well it will open lol
IMAG0220.jpg


Hope ya'll like it and give some people ideas. It's still not complete, for obvious reasons, I still need to install heat tape and set it up with a thermostat, but I've just ordered the heat tape so that's why its not done.
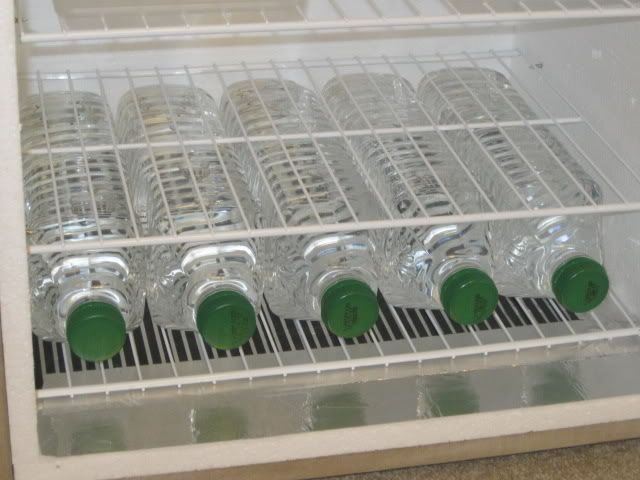
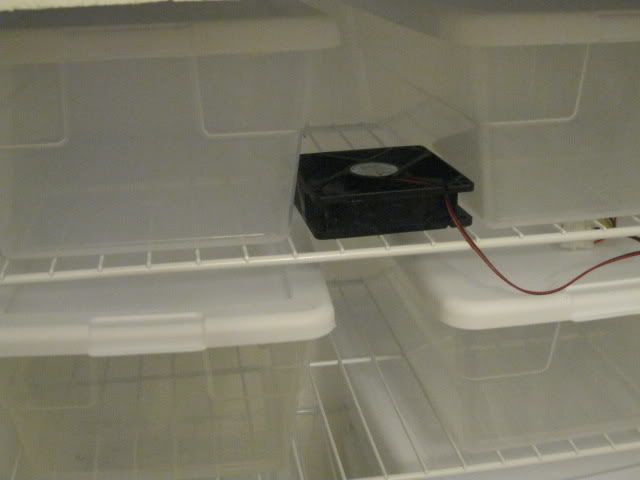
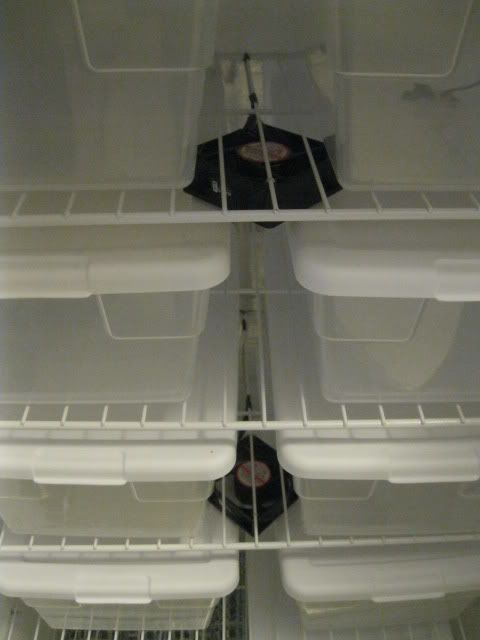
I've been thinking also that I'm wanting to put a computer fan in it to keep consistent temps within the whole unit, just havn't figured out where yet... lol. There will be 4 juice jugs with water on the bottom of it to help keep a more consistent temp.
 
Very nice! Can you make me one?? LOL
After I put up all the shelves in my snake room aka walk in closet I should make one :)
 
I like the look of the design. Let us know how it works when you get everything hooked up. :)

Thanks, Yes there will be MANY trials before it is actually used for incubating. But I believe in my work lol. I'm really wanting to figure out a way to get a little computer fan in and still be able to use the whole thing.
 
You should be able to drill just a very small hole to run the wires through. Some expanding foam could easily seal any excess space around the wires once you get it where you want it. Just mount the fan to the top with some spacers so that it pulls the air up and pushes it out to flow down the sides. You'd need to leave a corridor open for the air flow down the center though as you put the tubs in.
 
There won't be enough space for it at the very top, but you gave me the idea of attaching it to the top shelf and that should work perfect. I'd just run the wire to the back of the incubator and through the hole that I will drill for the heat tape electrical. I believe some silicone will fill the extra space that's left from the hole. I've also been thinking of some LED strip lighting for the back that's on a switch so that i could see better. It'd only be a flick on, take a look and flick off... An Idea...
 
At it again eh Nick? Giving me ideal projects to copy, like the plexi glass viv idea you had then built then I copied.

Keep them coming, your helping me put my new tools to good use

:cheers: Buddy
 
At it again eh Nick? Giving me ideal projects to copy, like the plexi glass viv idea you had then built then I copied.

Keep them coming, your helping me put my new tools to good use

:cheers: Buddy

Lol, No Problem, I've had this idea stewing in my brain for like a year, and through that whole year i basically built it in my head. Had what i was going to use and everything pretty much planed out, and then once you git to the hardware store you find other ideas of material to use instead that would work better. Like the wire shelving... it's wire shelving that you'd use in a closet, I just used a grinder to cut it and the little lip so that i had a flat wire shelf. And the hinges, different hinges then what i originally thought of, but these are better. And the way to lock it shut, I was thinking of something else (don't know what) but i saw the hooks and the light bulb came on.
I was even trying to think of a way to keep the heat tape from being directly on the foam, and I think I'm just going to foil tape some tin foil down shiny side up as to direct the heat up and then it wouldn't be right on the foam. Then a wire shelf would sit on the tape so the water juice jugs aren't directly on the heat tape either.
 
You did an excellent job. Very precise and well crafted, and it certainly looks spacious enough. Nice work!!!
 
Here's some more progress on the incubator... i wasn't able to do any more work on it until now because it was stuck at work and my car's not big enough for it... well it would... if the sub box wasn't in the way :D
IMG_0813.jpg

I put tin foil on the bottom (shiny side up, so the heat radiates off the bottom) and taped it down with foil tape obviously.
IMG_0814.jpg

Better picture of the hole where the cord goes through and how everything's situated there.
IMG_0815.jpg

View of bins in and everything (mind you those bins are for the hatchling section of my rack) I'll be getting more of those same bins to use for the incubator.
IMG_0816.jpg

A closer look at the juice jugs filled with water on the bottom to hold the temperature. There's FIVE there, so i hope that will help tremendously!
IMG_0817.jpg

I havn't totally decided yet on what I'm going to do with the fans. At first i was thinking 2 on the top shelf blowing air up the center, but now I'm thinking of putting one on the top and maybe another on down a couple shelves to help bring air from the bottom better. (Let me know your thoughts)
IMG_0818.jpg

Last but not least here's a shot through the door's viewing window.

I hope everyone likes it (I know I do) and feel free to take my idea completely and copy it (dimensions being your own depending on what size bins your wanting to use).
I'm still needing to work on bettering how I'm going to keep it standing better, on the carpet it sinks a little so I'm probably going to get a small piece of 1/4" sheet good and cut it so it's just a bit smaller then the footprint of the unit. That'll keep it up off the carpet much better.
 
Here's what i ended up doing with the fans, i put 2 in there. One under the top shelf and another one under the third shelf down, both blowing air up.
IMG_0819.jpg

Testing is in progress... so far it is taking a bit of time, which i can understand. It started around 74ish and now it's up to 77. I set it at 82 for the time being.
I will update once I've gotten results.
 
Oh wow, I love this! I'm wondering now if I can build this with custom storage underneath... I need both and they need to fit in a very specific space in my room. Thanks for the ideas!
 
I have a Styrofoam box that I took from work. Fish came to the store in it and we were throwing it out.. I put a heat pad in it and tossed a box in there to see if it would keep temp, and all night it stayed at 83 degrees. Though I would like to build something like this build. Maybe even put it on wheels to make it more mobile.
 
Nice build!!

Only potential problem I see is that with blowing the air up, eventually I think you will blow TOO MUCH air up, as heat does rise. So with heat naturally rising, and the fans also blowing it upwards, I think you're going to have one heck of a temperature gradient between the top & bottom shelves. I'm in the middle of an DIY incubator build right now too, and we're going to run the heat tape down the back, and the fan is installed at the top to blow the hot air downwards.

That's what I did, but I'm going to see how the temps do without the fan before I fork out the money for it.
 
We got a really awesome fan, 2 actually. Just in case.

It's really convenient because it's a USB fan with a retractable cord, so all you need is one of those USB wall chargers and it's ready to be plugged in, no splicing wires or anything. Also it has a little dial so you can make the fan blow faster or slower.

Let me try and find the link...
 
Back
Top