• Hello!

    Either you have not registered on this site yet, or you are registered but have not logged in. In either case, you will not be able to use the full functionality of this site until you have registered, and then logged in after your registration has been approved.

    Registration is FREE, so please register so you can participate instead of remaining a lurker....

    Please be certain that the location field is correctly filled out when you register. All registrations that appear to be bogus will be rejected. Which means that if your location field does NOT match the actual location of your registration IP address, then your registration will be rejected.

    Sorry about the strictness of this requirement, but it is necessary to block spammers and scammers at the door as much as possible.

The Rextiles Rack - 3rd rack project done

DeadMouse

Hungry, hungry Hognose!
Well, after seeing several threads surfacing about other people either enquiring or building their own rack systems, I figured I'd show off my latest one after spending months of redesigning (in comparison to my last one) and building it. I finally finished it all up and put it into action last night. It's a great feeling building something with your bare hands from scratch and having it work the way you want.

The front:
large_rack-front_empty.jpg


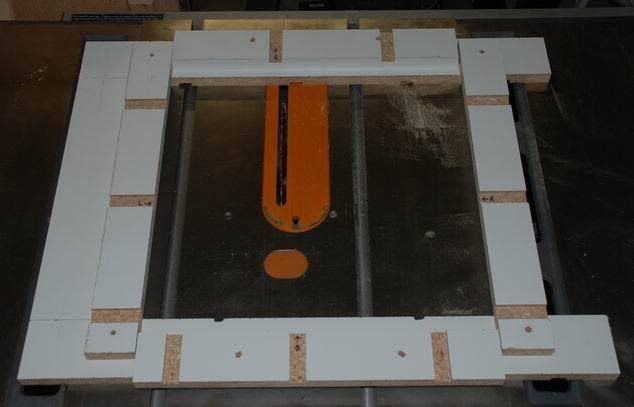
Each shelf is routed out using a jig I made to make precise cuts to fit the tile and flexwatt.

The flexwatt bare:
large_rack-heating_bare.jpg


The flexwatt covered with tile:
large_rack-heating_ceramic.jpg


I'm not a big fan of butt joints, so I tend to dado everything!

Each shelf is dadoed:
large_rack-shelf_dado.jpg


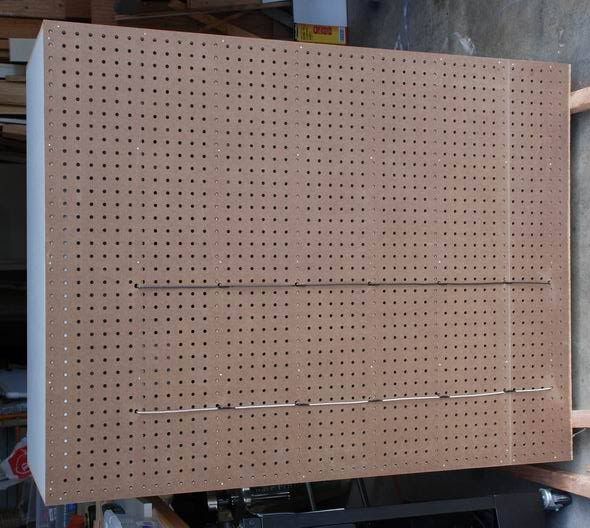
My wiring scheme was really the biggest change in this 3rd generation of racks I've built. The top shelf wiring and bottom control shelf is the main wire while all shelves in the middle section have separate pieces of wiring soldered onto the main wire and coated using liquid electrical tape. It looks really basic on the back which is a far cry from my last rack whose wiring was a real nightmare to behold.

The back with wiring:
large_rack-back.jpg


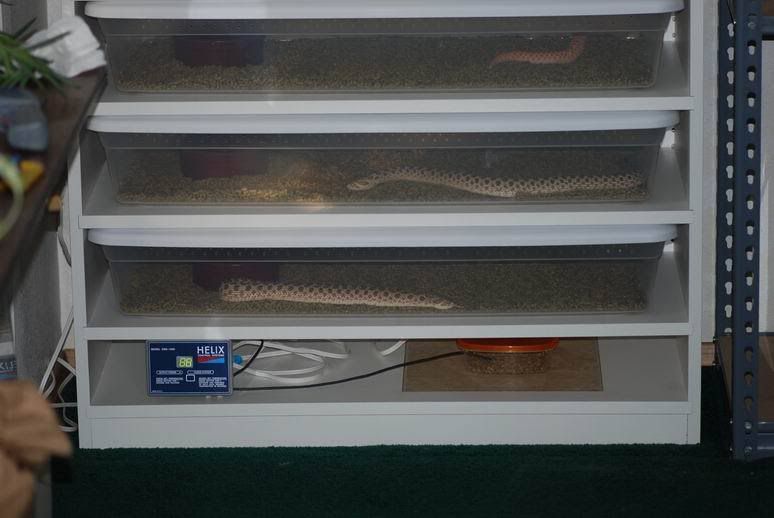
The bottom shelf is really a control shelf that is essentially the same as the others, only shallower using a small tub with the thermostat probe in it to monitor the temps. I once tried keeping a probe in an occupied tub heavily taped, but snakes have a funny way of fubar'ing anything you think you are clever in doing.

The bottom control section:
large_rack-bottom_control.jpg


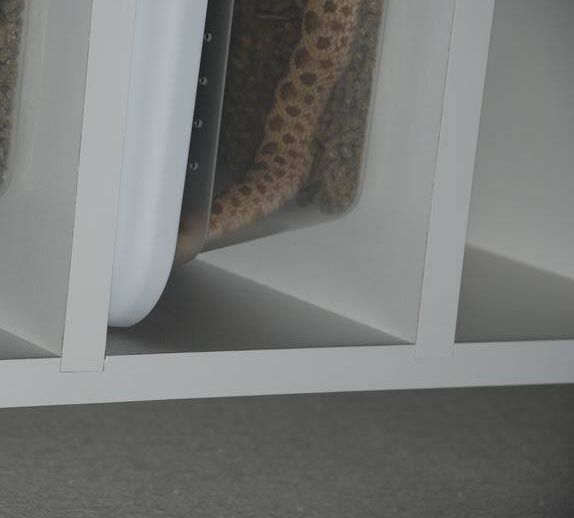
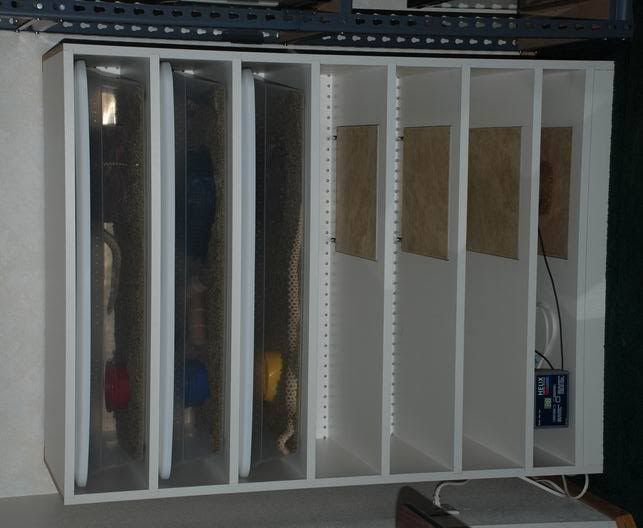
Each shelf is sized to house sterilite 41qt. tubs. I made a jig to help dado cut each side perfectly so that there is zero clearance between shelf and tub and yet there is no friction due to tightness, so removal is nice and smooth.

Half full with tubs:
large_rack-front_half_empty.jpg


Considering that our house has literally filled up with all of these large snake tanks, racks then became a much more idealistic solution to help alleviate the space management problems we are currently having. While it might be quicker, easier and even possibly cheaper buying a pre-made rack system, where's the fun in that? I'll let the following pictures show the space savings this new rack is allotting us.

One of our snake rooms before:
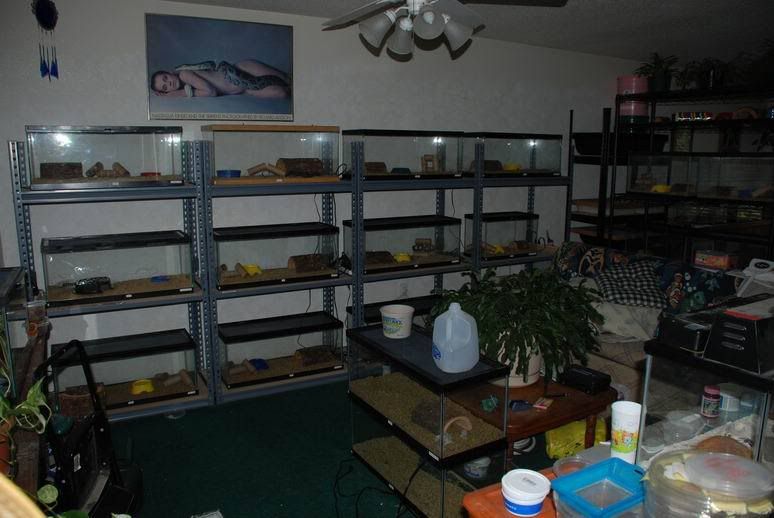
critter_room-before.jpg


And after:
critter_room-1st_rack.jpg


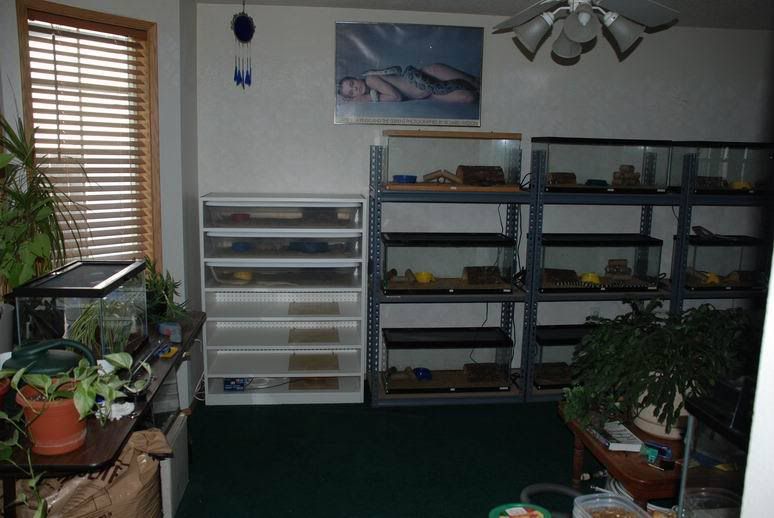
Now that I got this one knocked out, I just went and bought more shelving to get the second one built. While this new one took me several months to build, quite a bit of that time was spent exploring new methods of wiring as well as building the jigs to make the precision cuts. And even with the jigs and knowledge on how to now build this in a better more efficient way, it's still far from a simple weekend project, at least how I tend to overkill these things ;)
 
Well done! Looks very tidy. And to think, one of those will take the place of two of those earlier racks!!
 
That is really slick. I like how you routed out the space for the tile and the flexwatt. I'd love to see a picture of the jig you set up to do that.
 
Well done! Looks very tidy. And to think, one of those will take the place of two of those earlier racks!!

Thank you!

Those regular metal shelves along with those sliding screen top tanks just take up soooooo much room, it's ridiculous. I mean, they worked well for their intended purpose for the almost 2 years they were in service. But now that we've practically hit the 60 snake mark, things needed to change quickly. I haven't even show pics of our "game" room that ended up turning into our other snake room slash mice/rat breeding room. Sheesh, that game room alone has like 12 snakes/tanks and 5 tubs of rodents. It will be so nice to be able to consolidate almost everybody into one room. However, my walk-in closet will still house our BP's and hatchlings since I have a thermostat controlled space heater in there. I just need to build better racks to make better use out of the space in that closet.

That is really slick. I like how you routed out the space for the tile and the flexwatt. I'd love to see a picture of the jig you set up to do that.

Thanks!

I actually got the idea of routing the shelves for the flexwatt and using tiles from some other forum (I forget which) where a gentleman actually used the same technique. So really, I just stole the idea and used it for my own :) I'll take pictures of the 2 router jigs I used to make this rack. The other jig I didn't mention is a router base that is made just to make the exact dado cuts in the sides. I originally used my tablesaw to make the dado cuts in my first two racks, but it was prone to slop considering having to move the fence all the time, or make a jig for the tablesaw, and having to slide those big sides for each cut. The shelving jig is basically an open ended frame that you slide onto one side of the shelf and then the frame has guides held into by dowels (for easy removal) which basically guides the router. You'll see when I put up the pics tomorrow, it's actually a simple device.

It's just gorgeous! (Wish I could go on a field trip to your house!!)

Thanks a lot Nanci!

If you are ever in the Portland, Oregon region, you have a guest pass to tour our little zoo :)

That looks great. I wish some one could build me a rack, every time I try to build something it fails terribly.

Thank you!

Trust me, quite a few of my earlier projects over the last 20 years have failed miserably. What I eventually found out in order to be successful at doing something like this is basically two things: #1 Having the right tools and materials, #2 Having the proper workspace/environment.

A lot of people get confused and think you need a whole warehouse of powertools to do half of this stuff. But the reality is, with careful planning and some ingenuity, you can often get by with actually few tools and still make quality stuff. It just takes a lot of patience and practice.

But for me, the main thing has always been having the proper space to make these things. Making a rack like this might not take up a ton of space once completed, but when planning it out and making all your cuts and putting it together, often requires a little more room and time than you want to spend in your living room (if that be your "workshop"). I used to try and build stuff in places like that and it always ended up being a nightmare. Plus, all the dust and clutter everywhere, ugh!

The tools I used for making this were:
tablesaw
router
drill (and drill press although not necessarily needed)
soldering iron
wire cutter/stripper/crimper
screwdriver
and other little odds and ends.

My use of the tablesaw anymore is more or less just for cutting the boards to size and truing edges but you could get by with a circular saw and a straight guide which would be a cheaper way to go.

Another thing that really really really helps is using the internet or reading books on building whatever project you are interested in. 99% of the time, someone else has already done it and explains how. No point in reinventing the wheel unless you found a better way that better fits your needs. Seriously, the basic structure of my rack, other than my own personalized way of wiring, was taken from ideas that others had already done. Maybe one of these days I'll even make a howto for this style of rack :)
 
Great rack, and lovely hoggies modelling it!

Thanks a lot Janine!

Yeah, I think it would have looked a little odd if I had something other than the hoggies showing that off. We do have other species than hoggies in our collection right? :rofl:
 
That looks exactly like what I've envisioned for a rack system in my apartment. I have a friend who is great at building things like that and I'm sure I could get him to do it.

I was wondering if you could possibly list the materials and measurements you used to build that little beauty. Thanks so much for showing it to us.

Thanks!

The material list (off of the top of my head) is:
10 sheets of 48" x 16" x 3/4" melamine
1 sheet of 4' x 8'white coated pegboard (you can buy smaller, but I can get several backings out of one piece)
7 pieces of 11" Flexwatt
7 12" x 12" ceramic tile
14-gauge wire
16 post terminals (for wiring)
14 spade terminals (for wiring)
1 bottle of Liquid Electrical Tape
Solder + flux
~20 1-1/4" wood screws (for screwing the shelves to the sides)
lots of 1" finishing nails (for the backing)
1 DBS1000 Helix Proportional Thermostat
6 Sterilite 41qt. (model 1960) tubs
and other assorted scraps of wood to make the bottom kickplate frame and wall spacer for the back.

I'm hesitant to give actual dimensions only because of the so many variables involved, mainly this was built completely around the dimensions of the Sterilite tubs with the lids on. I know that not every store carries those specific model numbers or even Sterilite for that matter. So, you basically have to buy your 6 tubs and measure everything around those. And of course depending on whether you choose to use the lids or not is a huge decision as you can't choose to go lidless, make this rack and then decide that lids would be better, you'll have a gap inbetween the tub and the top shelf that might pose escape problems. And obviously making the rack for lidless tubs and then deciding otherwise will simply not fit. So, carefully think out what you really want. We chose keeping the lids on for a variety of reasons but the main one was in case of an emergency and I needed to transport these tubs immediately. Also, with the lids on, you don't need to utilize any type of external locking mechanism for snakes that can manage to slide lidless tubs around.

That's about it in a nutshell though for materials. Remember, get the tubs that best fit your plans and that will work for your snakes and then build the rack around the tubs. :)

Great job! It looks so clean and uncluttered.

Thank you very much! It will be very interesting how building 2 more racks to take the place of those metal shelves will look in the room. Actually those, just like the metal shelves and tanks were a temporary residency for our snakes, so are these rack systems. Ultimately, I want to build exactly what Bob Applegate uses: Bob's custom Tank/Rack system. This is by far the most awesome system I have witnessed. The pictures don't even do it any justice. When we visited Bob and Marilee over the summer, we got to see exactly how this system worked and it was truly an ingenious and well thought out design. This is my ultimate goal in the years to come! :licklips:
 
Here's a pic of the jig I made and used to route out the shelves:
flexwatt_jig.jpg


Basically it's just an open ended frame (no frame on the right side). The frame is basically just held together with biscuits and glue. The dadoed pieces (scraps) on the top of the frame are the guides for my router. The guides are only held in place by loose dowels so that the guides can be switched out in case I need to put in different sized guides. Overall, this jig isn't really the most sturdiest and without careful handling, it can easily be broken. When it's cradling a shelf and clamped down, it's as sturdy as it needs to be. After making earlier rigid, sturdier jigs, I found that those jigs had no flexibility in regards to swapping out guides and such. So I opted for the trade-off that gives me more options and weaker construction. ;) I basically slide a shelf into the right side, clamp it down and rout away.
 
Awesome!!! Thanks so much. Now all I have to do is con my friend into building one for me...lol

Again, thanks for the materials list.
 
Well, after a year of putting off completing my 2nd rack, I actually finished it at the beginning of this year and put it into action. For all intents and purposes, it's pretty much identical to the first one (on the left) with the exception of some edge banding on top and using a biscuit joiner for installing the kickplate instead of using angle brackets. Here it is:

critter_room-2nd_rack.jpg


We've also been revamping our snake room quite a lot. Eventually we'll be replacing all of the tanks with racks although I'm not sure if I'll try and build taller racks to better utilize my wall space or not. They're definitely heavy enough as is.

critter_room-2nd_rack_opp-angle.jpg


I also have about 30+ baby snakes in a walk-in closet upstairs which I'm trying to move downstairs into the snake room so that everything is consolidated into one space which will be easier to maintain and keep track of. That's my next project, baby racks...

Thanks for looking. :)
 
Back
Top