• Hello!

    Either you have not registered on this site yet, or you are registered but have not logged in. In either case, you will not be able to use the full functionality of this site until you have registered, and then logged in after your registration has been approved.

    Registration is FREE, so please register so you can participate instead of remaining a lurker....

    Please be certain that the location field is correctly filled out when you register. All registrations that appear to be bogus will be rejected. Which means that if your location field does NOT match the actual location of your registration IP address, then your registration will be rejected.

    Sorry about the strictness of this requirement, but it is necessary to block spammers and scammers at the door as much as possible.

Ya know my post about making fake rock wall???

MomFor2Gifts

MomFor2Gifts
:punch: Umm, ya know my post about making the fake rock wall?

http://www.cornsnakes.com/forums/showthread.php?t=33400

Well I followed the directions in that link I provided that shows you how. I have to say the results thus far look great but the site says it is easy????

Just wanted to let you know it is anything but easy, lol. I am on day 6 of working with it. Granted I have only worked on it about 1 to 2 hours a day but dang, it takes a lot of work and time.

Also it says cheap? I am not sure what snake hobbyist consider cheap honestly, but to me $60.00 for Styrofoam, expanding foam, M.E.K., Tile Adhesive, paint bucket, brushes and hot glue, is not cheap!

I can't say that I would do it differently though if I had it to do over again, the results so far look awesome but just wanted to be honest and say, it is a lot of work, even though the site with the directions I posted says it is easy.

I just didn't want to mislead people thinking it was going to be as easy or cheap as it says. I would rather lose a little face and be honest about what I found than to have someone else get into it thinking it was going to be cheap or easy. :wavey:
 
I'm going to try this myself some time next week for some of my smaller tanks and have a couple short cuts to cut costs... I already have the trash balers at work saving me some of the styrofoam packing blocks (3' x 2' x 4-6" thick) and some of the scrap wood also used for packing. When I tiled my buffet top, I bought the ripped bags of mortar that were taped back up, at a discount, so I'll look for some of those first. I have old paint brushes and paint thinner already, and will hit Big Lots or the Dollar Store for a plastic container or bucket. Since I'm using big blocks, I probably won't need the foam, but we'll have to see. I need a glue gun, but will get one of the better ones since the last time I got one I became addicted to glueing all kinds of stuff with it and wore the cheap one out :D

What is M.E.K? :shrugs: and are you going to show some pics? I'll document how it goes since I find all kinds of reasons to take pics anyway, lol.
 
I would post pics but sadly about 3 months ago, my digital camera broke and me being Mrs. take everything apart and try to fix it ... made it worse lol. I ended up chucking it after I broke the shutter button, trying to open it up.

I may go and try to pick up another digital cam if I can find one cheap. We will see, but if I do, I will post pics of how far we have gotten. I think after tonight's 2 coats dry we should be ready for the sealer and then weeeeeeee, yeahhh, we can put in his Pro heat panel and the A419 we have, and Sosa will have one nice set up.

I have a few concerns about what you will be using. The Styrofoam packing blocks you have will be wayyyy to large and stand out too far from the wall, taking up a major portion of your viv. we used 1/4 & 1/2 inch and it actually takes up more room than you think once you get on about 5 coats of the Tile Adhesive over it.

Just keep in mind with the tile adhesive a 1/2 foam wall will protrude into the viv 2 inches or more depending on how many coats you end up needing to apply.

As far as the mortar goes, the reason you use tile adhesive is because it is super fine, it is like clay to an extent. Anything with even a remotely sandy finish will rub on your snakes skin and really rip it up, casing them serious injury or even death.

We have used mortar before for a few crack repairs and no matter how much you water it down it still has a grainy feel, so please don't use that, I beg you.

On your Styrofoam blocks just cut them in two or three, thickness wise. We used two different sizes to make it dimensional. When you get to adding the Styrofoam to make shelves it will seem really shaky and not real secure, just hot glue it in place and use the expanding foam on the under side, it is just for holding it in place until you get a few coats of the adhesive on. After several coats, those shelves are rock solid.

We just kind of threw shelves here and there, short pieces leading to a larger shelf, etc. and one on the side that is tilted for him to get closer to his heat panel if he wants to.

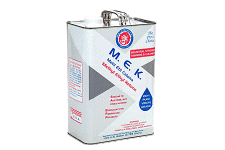
M.E.K. is methyl ethyl ketone - The site said paint thinner would work but I tried three different types as well as pure acetone and none of them worked, so I went onto a few science sites and researched solvents and found that M.E.K. is used to melt Styrofoam and it works great.

It doesn't like super melt so you can do it a few times and get the groves and gouges you want in your foam to make it look the way you want. Just don't use plastic brushes because it will melt them. I used .89 short bristle wood brushes from local hardware store.

The M.E.K. is sold in the solvents aisle at hardware stores right next to the paint thinners and lacquer. Here is a pic of it in case you have not seen it before.

MEK1GL_5054.gif


They sell it in small containers, but this was the only pic I could find to show you what it was.

Anyway hope this helps.
 

Attachments

  • MEK1GL_5054.gif
    MEK1GL_5054.gif
    25.9 KB · Views: 66
Actually, I'm starting with the larger sized blocks so it will be one piece, and I can carve and melt them to create the shelves, ridges, shallow caves, etc. instead of building them up. I don't think the tile adhesive or mortar really matters if you apply a couple layers of sealer on it afterwords, which in this case I would suggest as you really don't want it to obsorb anything, (liquids, smells...). It will take some experimenting.....
 
Yeah, once these last two coats dry we are going to seal it, with a water based sealer. I don't know which one yet, but we are going to the hardware store tomorrow, I will figure it out then. We are going to put some color in the sealer itself to get a darker grey than the color that the tile adhesive dries.

Let me know how yours goes. It is a long process and kills your arms lol but it is worth it in the end.
 
Back
Top