Nanci
Alien Lover
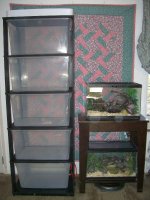
I put together my third AP rack today. Looks kind of barren without the bins being furnished. It took 20 minutes to do the rack itself, and about 15 minutes to do the heat tape. I have never seen anything so well-packaged for shipping! It takes almost as long to unpack it as it does to assemble it! You never have to worry about an AP rack being damaged in shipping...
This is the Animal Plastics Economy Plastic Rack, 5 shelf 66 quart model.
Helpful hints:
1. Vacuum your carpet before beginning, so everything on your floor dosn't static cling to the pretty black rack.
2. Buy a cordless power drill. I can't imagine assembling this without it. Putting together just one rack will be worth the price of the drill.
3. But a two-to-three prong electrical adaptor if you need to, for your thermostat.
4. Buy carpet sliders to put the rack on. Moving it to the perfect position will be so much easier on it.
5. Don't remove any stickers until you are completely finished.
Next to the rack is my 10 gallon "rack" for babies. Calli lives upstairs, Ruby lives downstairs. Ruby is ready to move to a rack. Calli has a bit of growing left to do. I think this rack will contain the kingsnakes Inez, Janine and Jewel, and Big Jake's feeding bin.
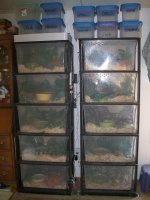
")