Jay@PJCReptiles
"Quality Before Quantity"
Hi Everyone,
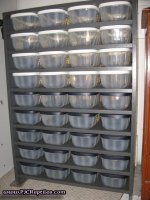
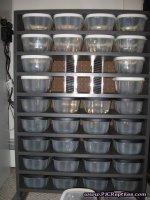
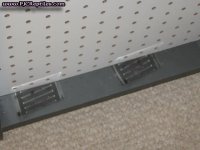
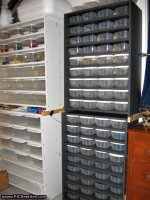
PJ and I had to go to the Super Cheap -O- Dollar Mega Mart to see if we could get some supplies today (i.e. water bowls, hides, paper towels etc.). While we were there we noticed some really nice bins that will be excellent for the baby racks we need to build for this seasons pippy's. We looked around some more and came across some melamine shelving for only $1.99 each. This was definitely a bargain as Home Depot sells the same ones for $9.99 each and the only difference is the cheapo ones are grey and the Home Depot ones are white. So we decided to grab what we could and start to build the baby racks now. Each rack is 3' H x 2' W x 11 1/2" D and holds 36 bins. We purchased these bins ($1 each) because they are a little bigger then the sandwich size bins that some baby racks use and will be handy if we have to house them for a longer period of time. The actual center shelves are only 9 3/4" deep so when I placed the peg board ($3.99 each) on the back for ventilation it makes a little recess in the back for the wiring. I had some FlexWatt here and decided to try using "Back Heat" for these ones as belly heat may get too hot for these smaller bins. I got out the tools and started to assemble (b.t.w. everything was already pre-cut to size) 2 hours and about $60.00 later I had it complete. The only thing I need to do is get a rheostat and finish wiring the FlexWatt. PJ and I ended up getting enough material to make 3 of them. Some smaller manufactured baby racks with heat cost as much as $200.00 and hold less then half of the ones I built. So after I finish building the other 2 we will have 3 baby racks with 108 bins for under $180.00....sounds like a bargain to me. Here are some pictures and thanks for looking.
Jay & PJ